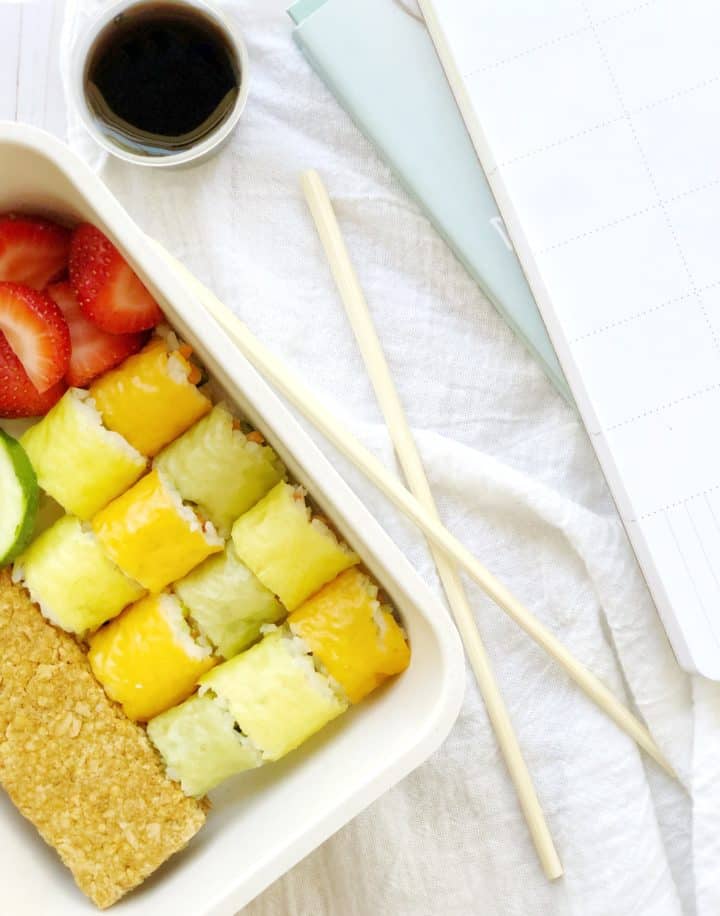
Sushi has both a modern and traditional flare, but it can be difficult for the kiddos to realize just how classy this dish is! That is what makes this homemade sushi rolls dish is so appealing. Wrapping sushi in your favorite child’s color can both expose them to other cultural foods, or get them involved in eating something that you eat on a regular basis. This homemade sushi recipe is fun to make with the kids and resembles a classic California roll.
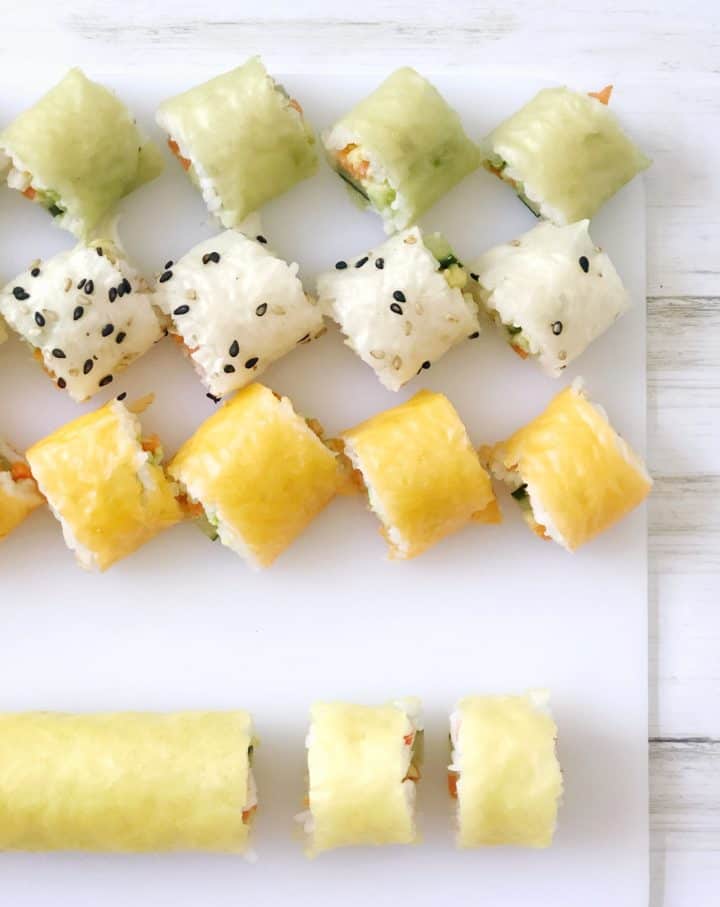
Sushi may be too different for some eaters. Sushi contains a lot of different textures, making kids skeptical of even trying it. By wrapping it in different colors, it gives kids a reason to take bite (and even adults!). It's just a little more fun when food is colored.
Why You'll Love This Easy Sushi Recipe
- Versatility- This dish can act as a snack, appetizer, or even something to eat for lunch! It depends on the quantity, so make extra if you are super hungry! You can also easily add or take away ingredients from sushi rolls, making it easy to please for picky eaters. You can find all these ingredients at your local grocery store. The bamboo mat, you'll probably have to find at an Asian store or online.
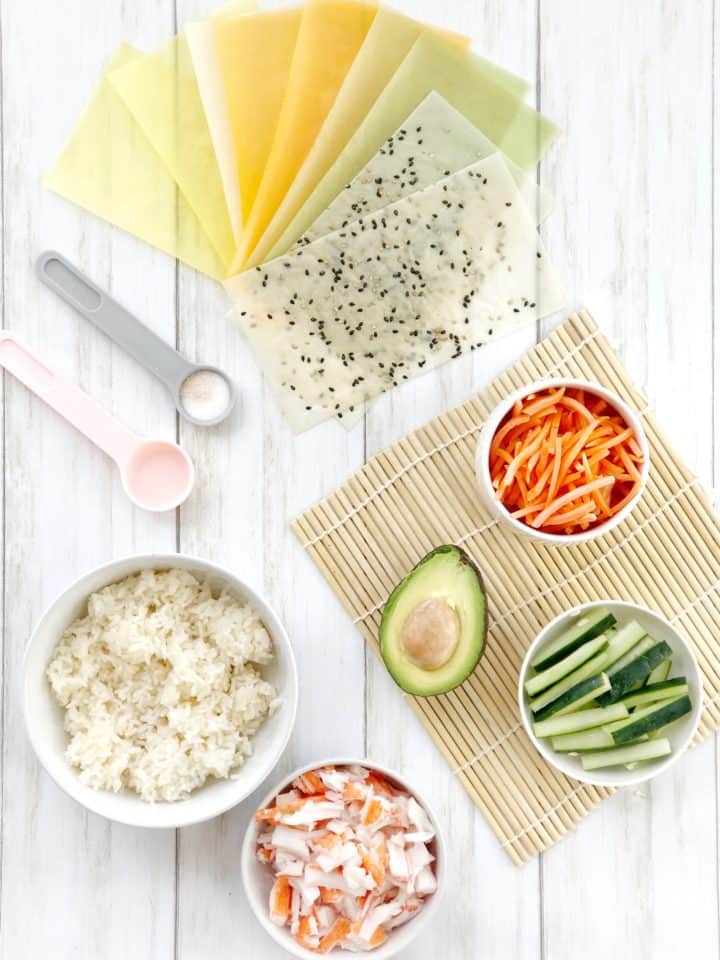
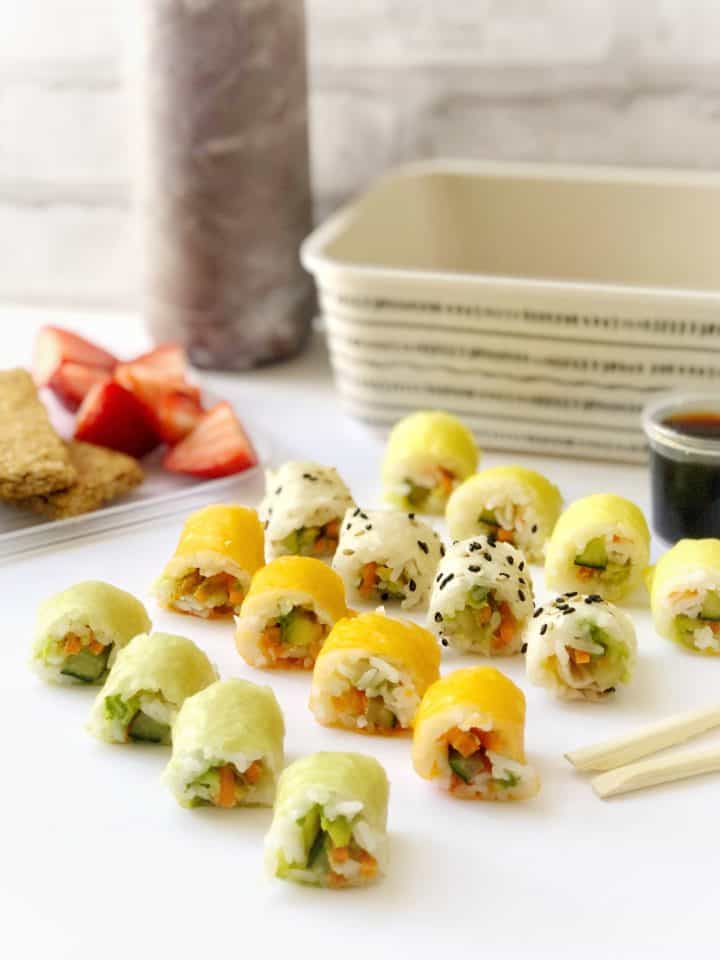
- Veggie Packed - These sushi rolls contain carrots, cucumber, and avocado. All three of these veggies are highly nutritious, specifically by being high in antioxidants and fiber.
How to Make California Rolls
How to Make Homemade California Rolls
First, gather all your ingredients on a clean counter top. It's great to have everything ready to go so you can make the process go smoothly. You'll want to cut your cucumber thinly into strips. Then you'll want to prepare the sushi rice. Take room temperature cooked rice and mix it in with the rice wine vinegar, sugar, and salt. The rice should feel sticky. Cover this with a damp paper towel and set aside. Honestly, I've used regular Asian rice from the rice cooker before, but if you want the real deal don't skip this step.

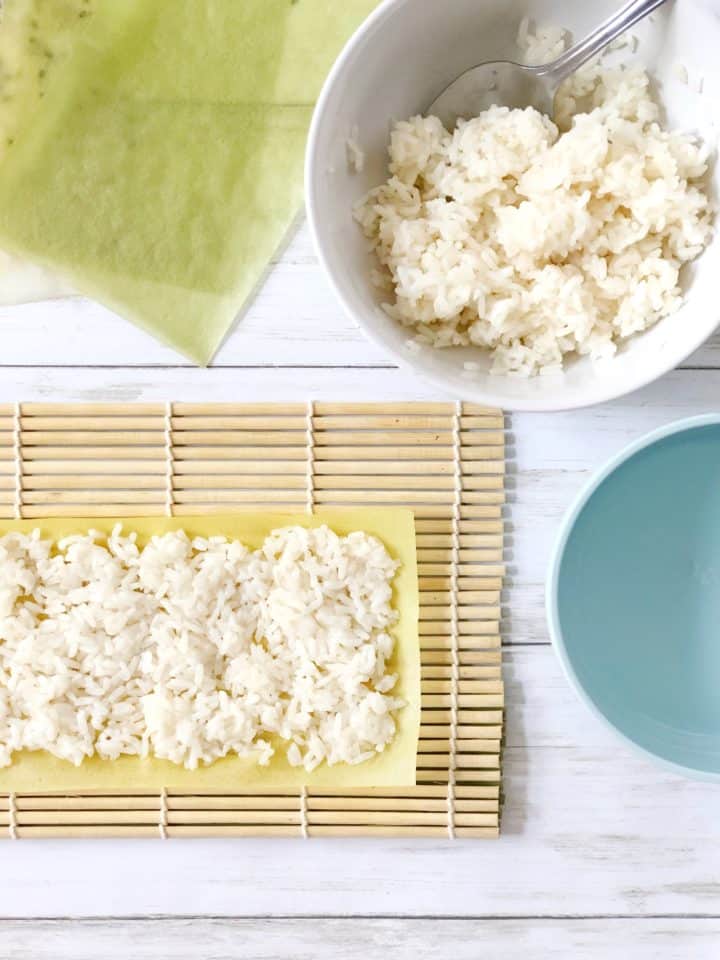
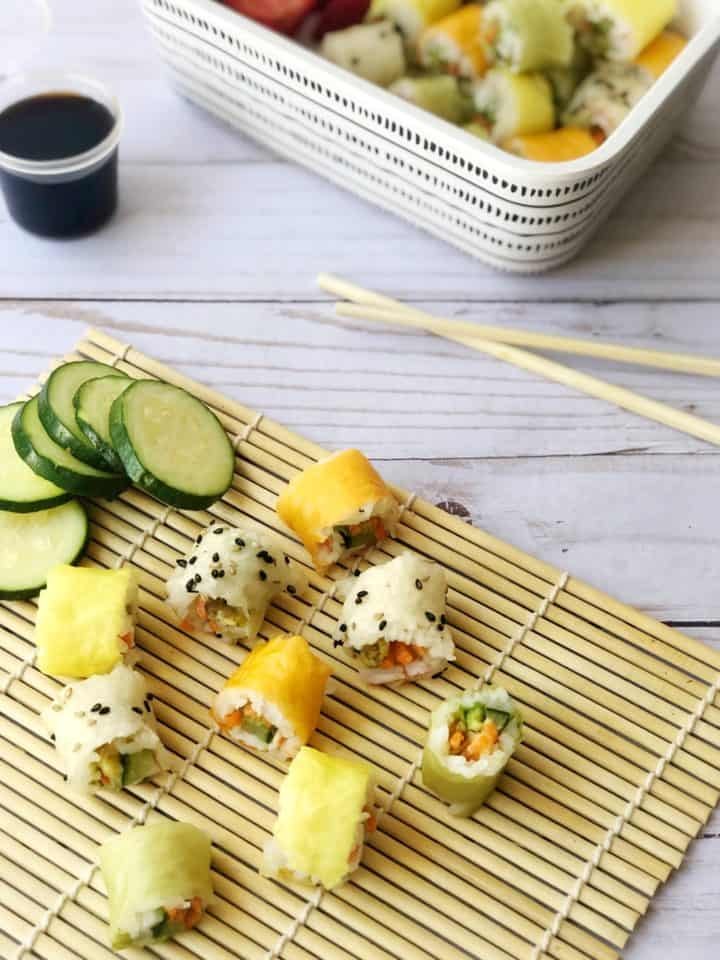
Next, on a bamboo mat, lay out a soy sheet horizontally. Gently press a thin layer of rice onto the soy sheet evenly, leaving 1-2 centimeters empty so that you will be able to seal it once finished. If you can't find soy sheets, feel free to use a sheet of nori seaweed. Be sure to have a warm bowl of water nearby to dip your fingers into. This will help prevent rice from sticking to you!
What’s left? Layering. This is a very important step. Layer your filling ingredients closely together in the middle of the soy sheet. Be sure to layer lightly. You don’t want to have your rolls be to full, otherwise they will bust open.
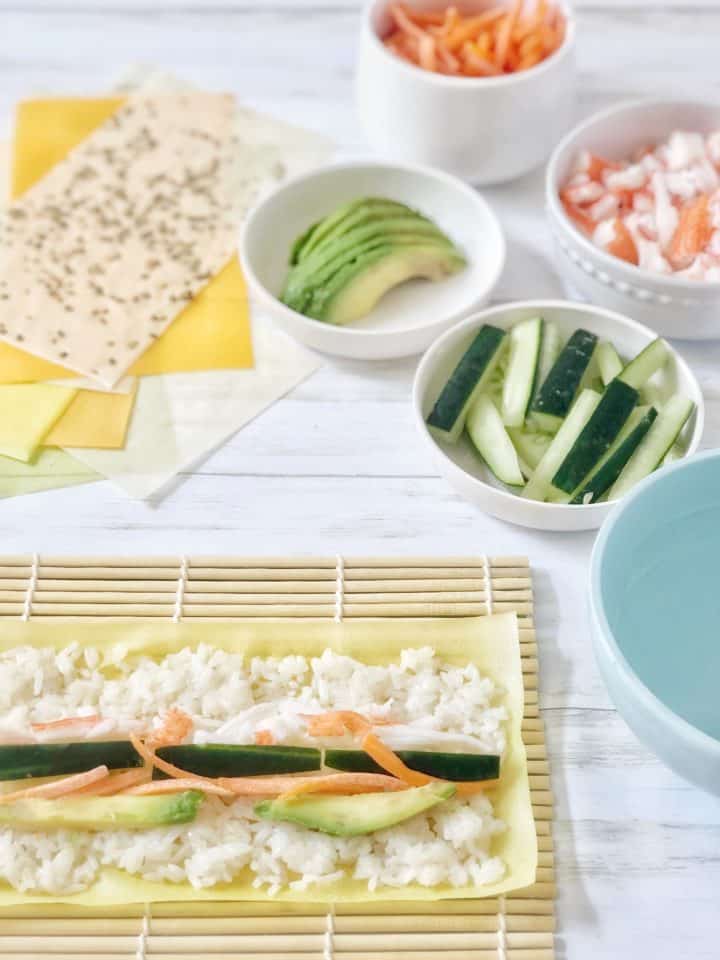
Then, lightly coat the outer edges of the soy sheet with cold water so the soy sheet seals when it is rolled.
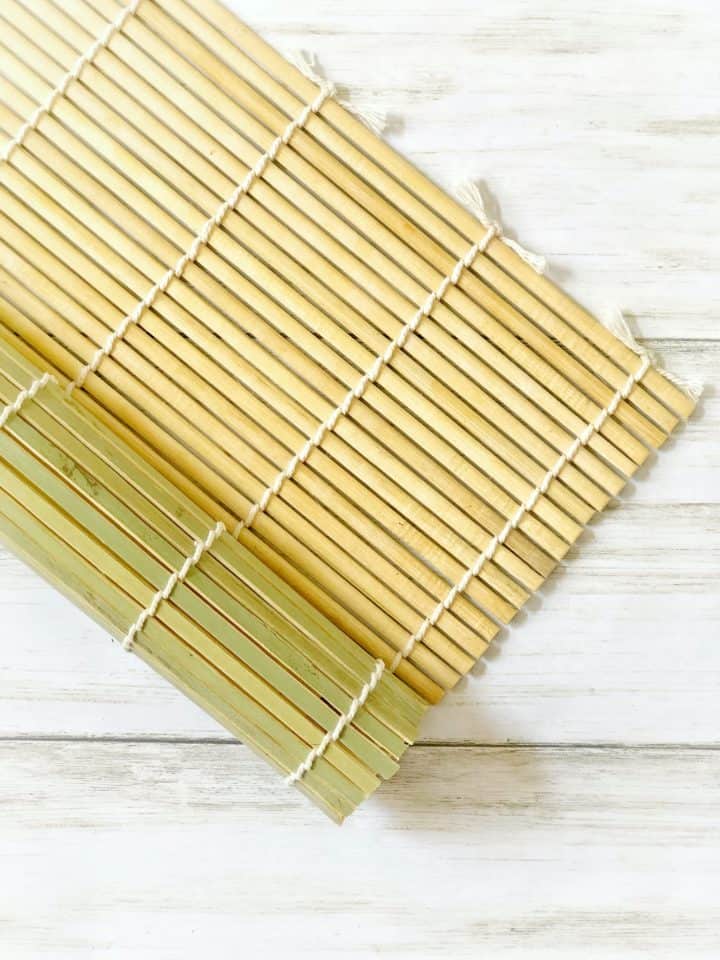
Here's a pro tip for you: Use a bamboo mat to roll your sushi tightly and slowly for the perfect sushi. Pick up the bottom edge of the bamboo mat and roll tightly until the top and bottom of the soy sheet closes. You should give it a few rolls back and forth and make sure the soy sheets seal properly. I like to wrap the sushi mat with plastic wrap for easy clean up.
Finally, cut the roll into ¾ inch slices with a very sharp knife. Be sure to wipe the blade with a wet towel between each cut to so each sushi roll is cut precisely. You can sprinkle sesame seeds if desired. Enjoy with some pickled ginger at your sushi party!
Cook's Tips To Make Homemade Sushi
- Allow for 1-2 centimeters of room on the edges of your soy sheet so it seals properly when rolling.
- Layer lightly so the sushi roll doesn’t burst in the end. You don’t want to do all this work for nothing!
- Use a sharp knife in the final step of cutting each roll.
- Vegetable options: Substitute or add different veggies such as cucumber
- Protein options: Substitute or add different fish such as spicy tuna, making sure to use sushi grade fish. Just use a sharp knife so you can thinly slice the fish. You may also try smoked salmon and cream cheese if you're family is up for it.
- I don't suggest raw fish unless it's sushi grade fish, and I'm not a doctor so kindly ask your pediatrician for his desired age recommendation to try it.
FAQ:
- Can you freeze these?
- No, unfortunately these won't hold up very well in the freezer
- How long will it keep in the fridge?
- This dish is best served within 24 hours.
Looking for more easy, versatile food ideas?

Leave a Reply