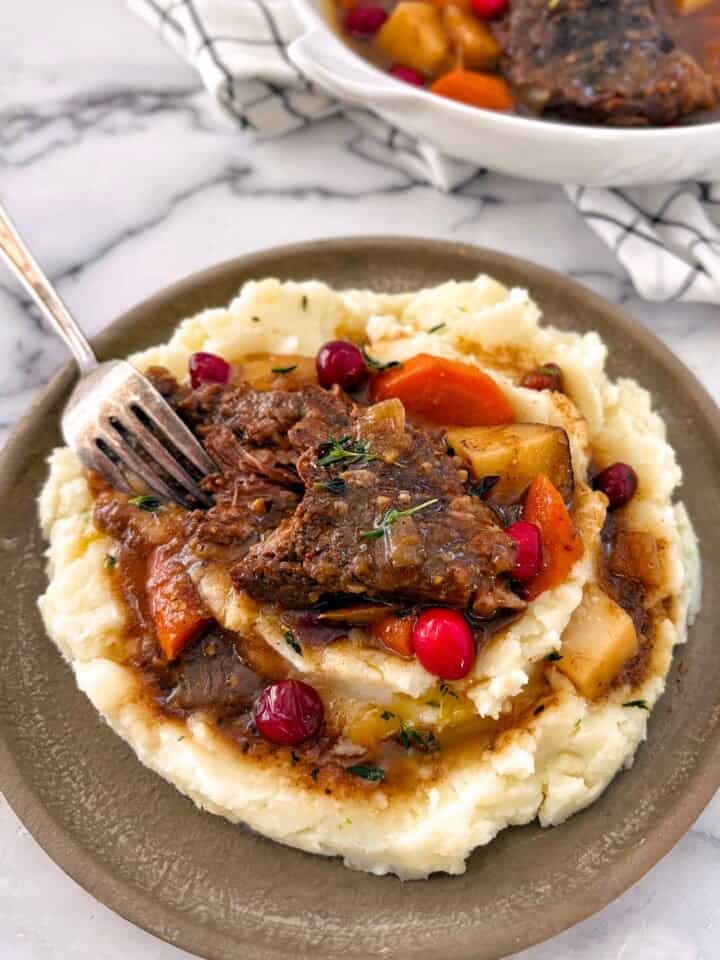
I love sharing recipes that I know are going to expand your horizons, and this one is just that! If you have never heard of it before, coxinha is a popular Brazilian street food. It is essentially a Brazilian chicken croquettes Fresh, shredded chicken and spices are wrapped in dough, breaded and deep-fried. It is perfect for an appetizer or party snack! I hope you like this coxinha recipe!

For this recipe, I used my instant pot. If you don't have an instant pot, any pressure cooker will work. If you don't have a pressure cooker at all, you can modify the recipe a little bit by using precooked chicken and store bought broth. You can also tweak the filling to suit your preferences as desired. Coxinhas can be made vegetarian by swapping the chicken for soy meat or jackfruit. This popular food also has additions to the filling like cream cheese, potatoes, and lime juice.

Why You'll Love this Coxinha Brazilian Recipe
- Waste Not - This recipe is made from scratch from start to finish without shortcuts. Not only does this cut down on preservatives and allow you to control each layer of flavor, it is also a great way to reduce waste. Think of the packaging you will avoid throwing out by making your own chicken and broth. As an added bonus, you can leave all of your discarded skin and bones in the instant pot to make bone broth for later!
- Party Favorite - Coxinhas have a signature teardrop shape, which makes them visually pleasing, and perfect for serving at parties. Your guests will love that they look a bit fancy, but also satisfy the craving for crunchy, gooey fried food.


Ingredients For Coxinhas Dough
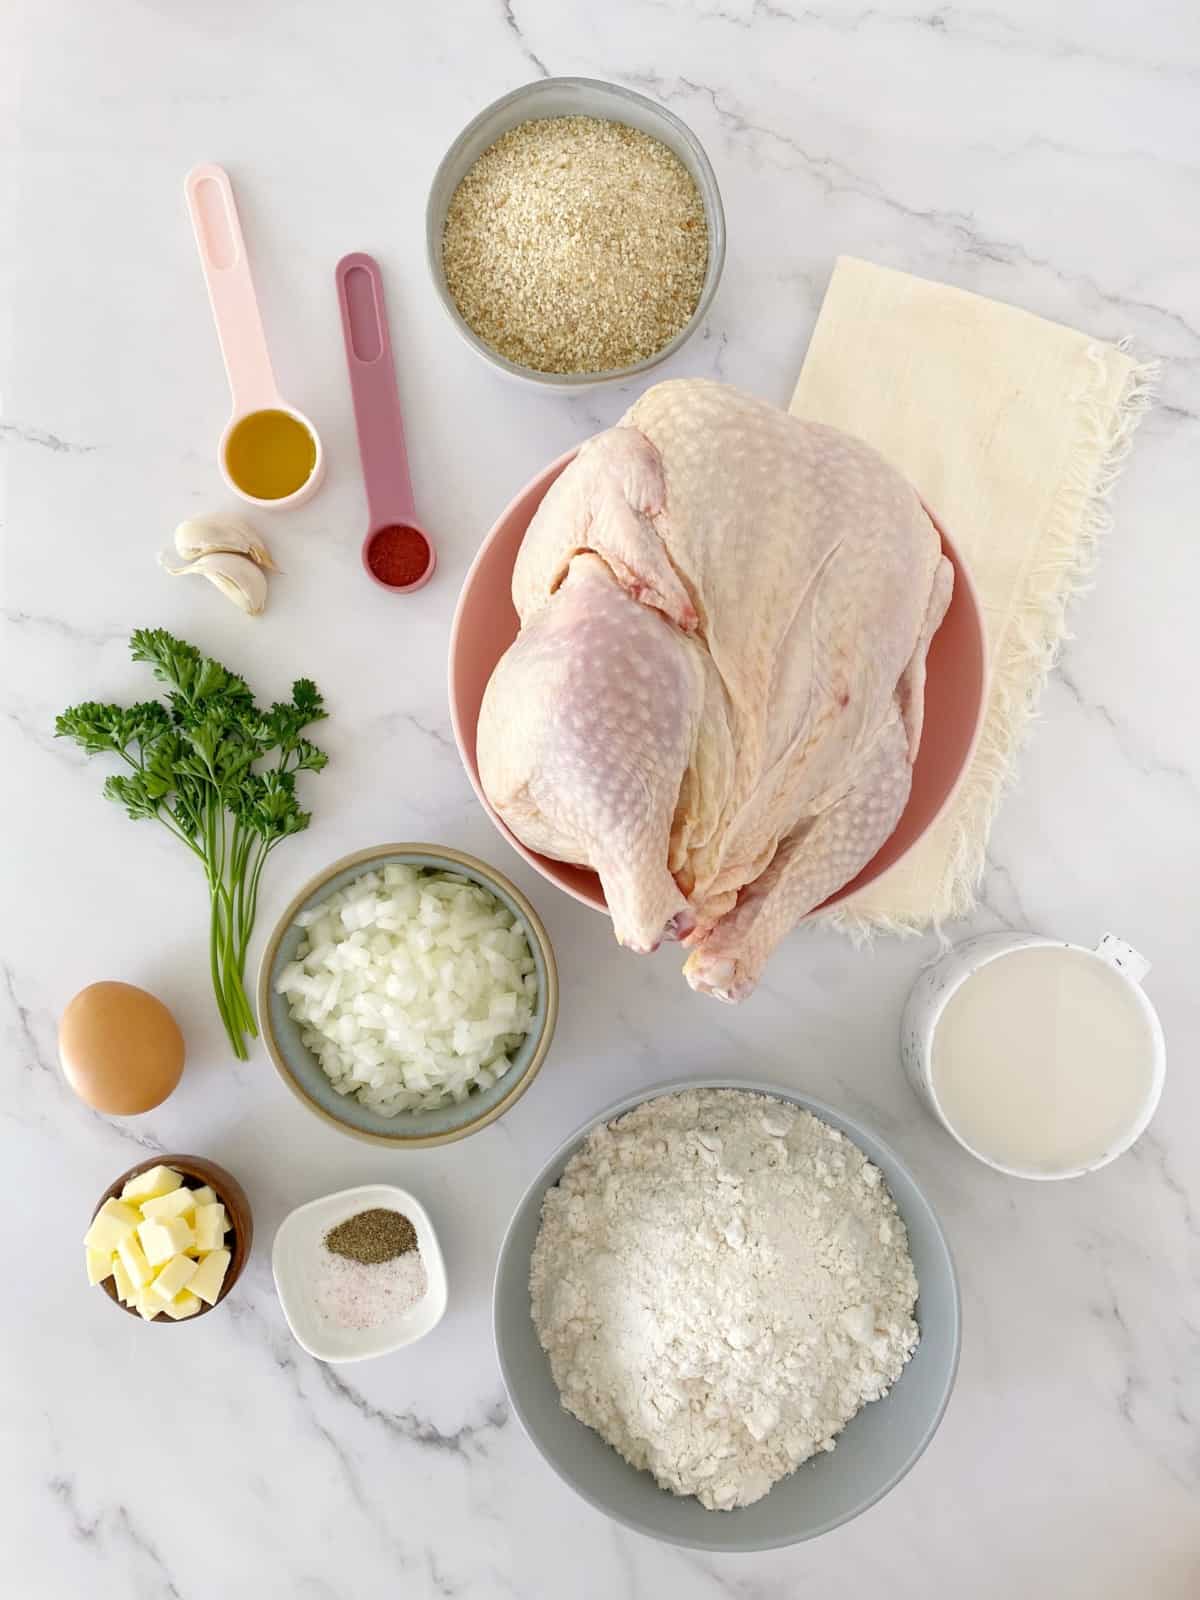
• Flour - You will need all-purpose flour to make the dough for your coxinhas.
• Chicken Stock - When you pressure-cook your chicken, you will be left with the chicken stock needed to make the dough. If you are using precooked chicken, make sure to pick up a few cups chicken broth from the store to lock in that extra layer of flavor.
• Butter - Adding butter to your dough offers delicious flavor, but also helps make the dough lighter and flakier.
• Paprika - You will need paprika for the dough, as well as for the chicken filling. Paprika adds a little zest and spice.
• Salt and Pepper - Basic salt and pepper are essential for any seasoning. You will need it for both the filling and the dough.
Ingredients for Filling
- Chicken - For this complete recipe, you will need a small, whole chicken. Somewhere between 3-3 ½ pounds is ideal. Keep in mind that if you get a bigger chicken, you will need to adjust your cooking time. If you don't have access to a pressure cooker, you can use precooked, shredded chicken.
- Onion - Onion is a tasty part of the filling. I like yellow onion to complement the flavor of the chicken, but coxinha filling is flexible, so adjust this as needed.
- Garlic - This recipe is tastiest with a good amount of garlic. I find 2 cloves of freshly minced garlic to be just right.
- Oil - This recipe calls for oil twice. You will need a little oil to sauté your onion and garlic, and more for frying your coxinhas. While you may like to use something lighter, like olive oil for the onion, you will want a sturdy, affordable oil with a high smoke point for deep-frying. Vegetable and peanut are great options.
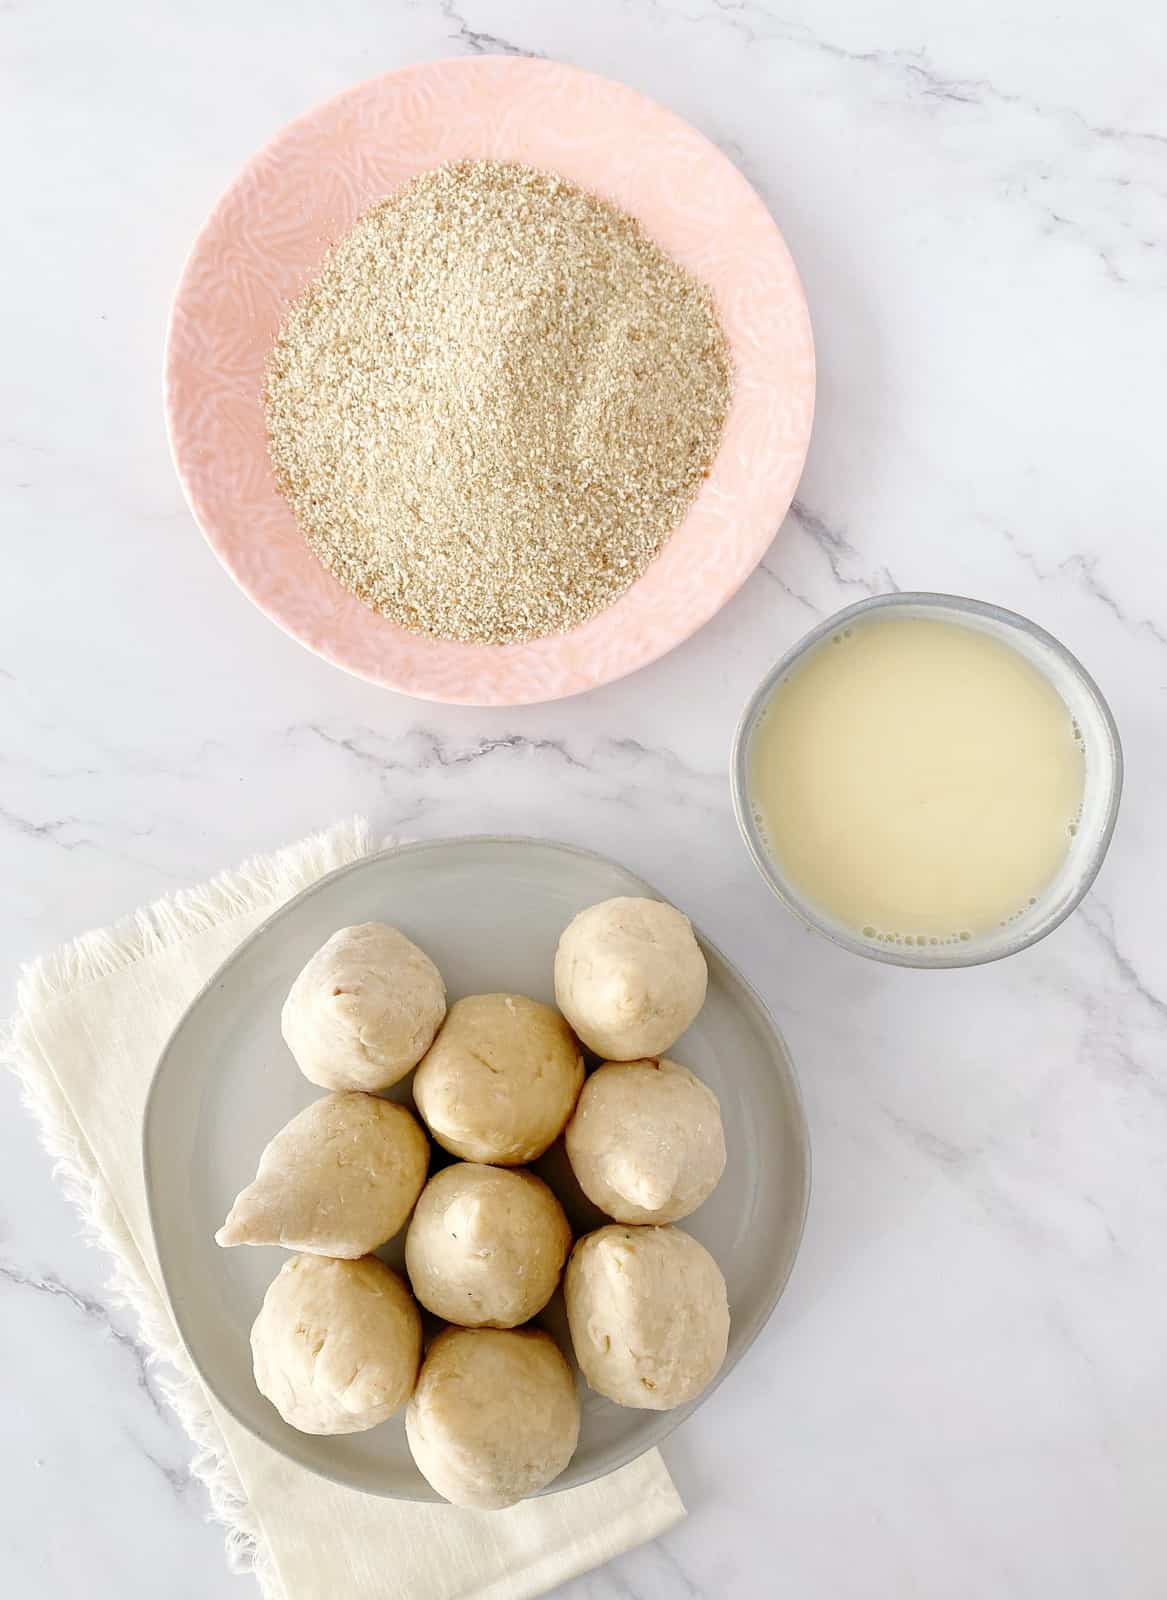
- Breadcrumbs - One of the best part of coxinha is the crispy outer crust, thanks to a coating of breadcrumbs!
- Milk - This is for dredging. You will whisk the milk into your egg
- Egg - You need something to adhere the breadcrumbs to the dough. A simple mixture of egg and milk does the trick.

How to Make Coxinhas
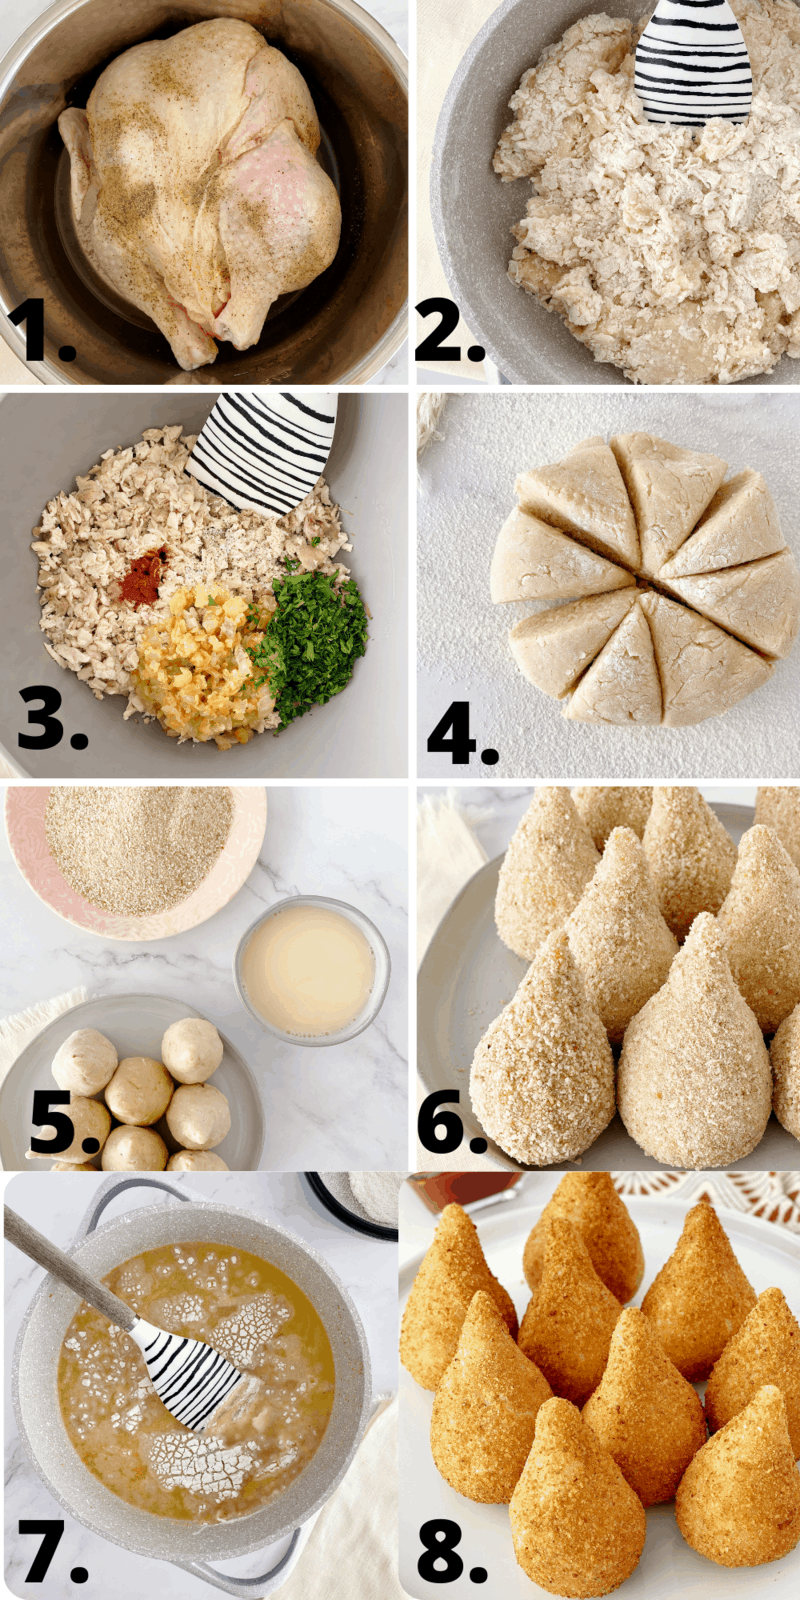
- Place cleaned chicken inside instant pot or pressure cooker with 1 ½ cups of water, ½ teaspoon salt and ¼ teaspoon pepper. Cover with the lid, set the lever to "sealing" position, cook on high pressure for 21 minutes. When chicken is cooked and cooled to touch, debone and finely shred the meat. Keep 2 cups of the chicken broth.
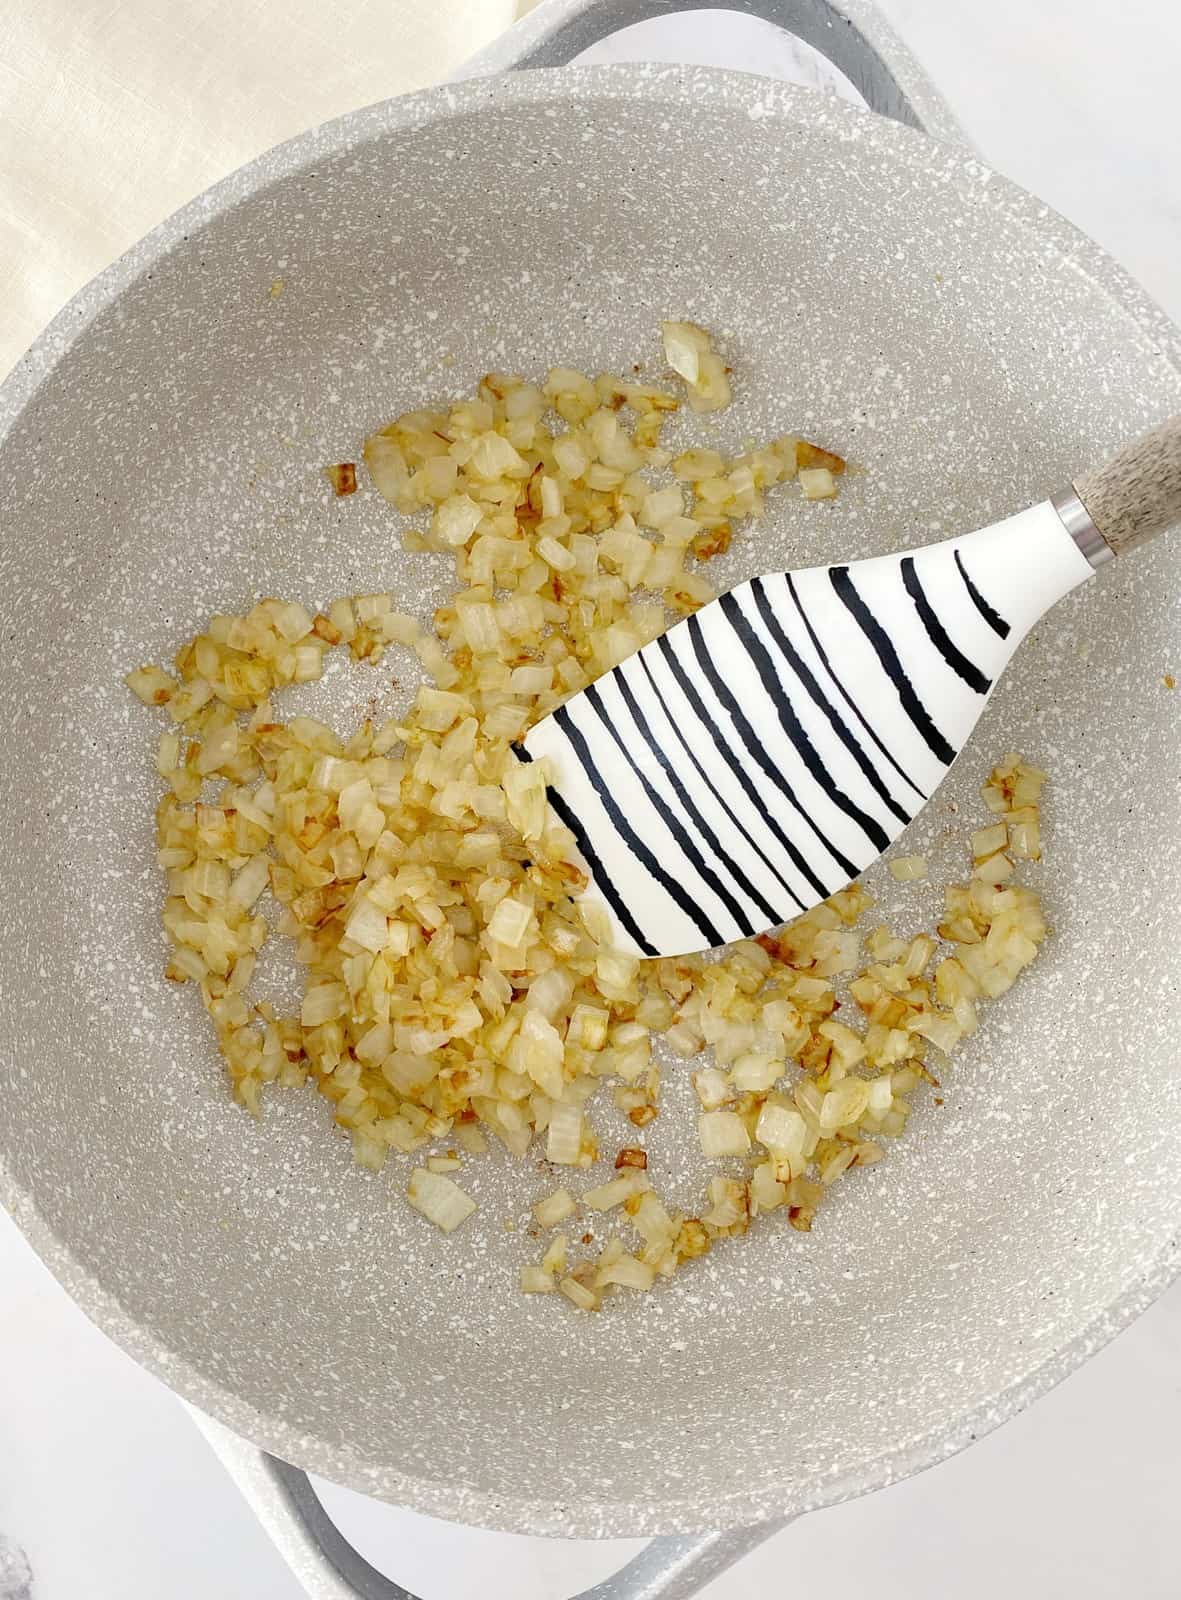
- Sauté the yellow onion and garlic in 1 tbs oil, for 2-3 minutes or until the onions become translucent. Set aside to cool.
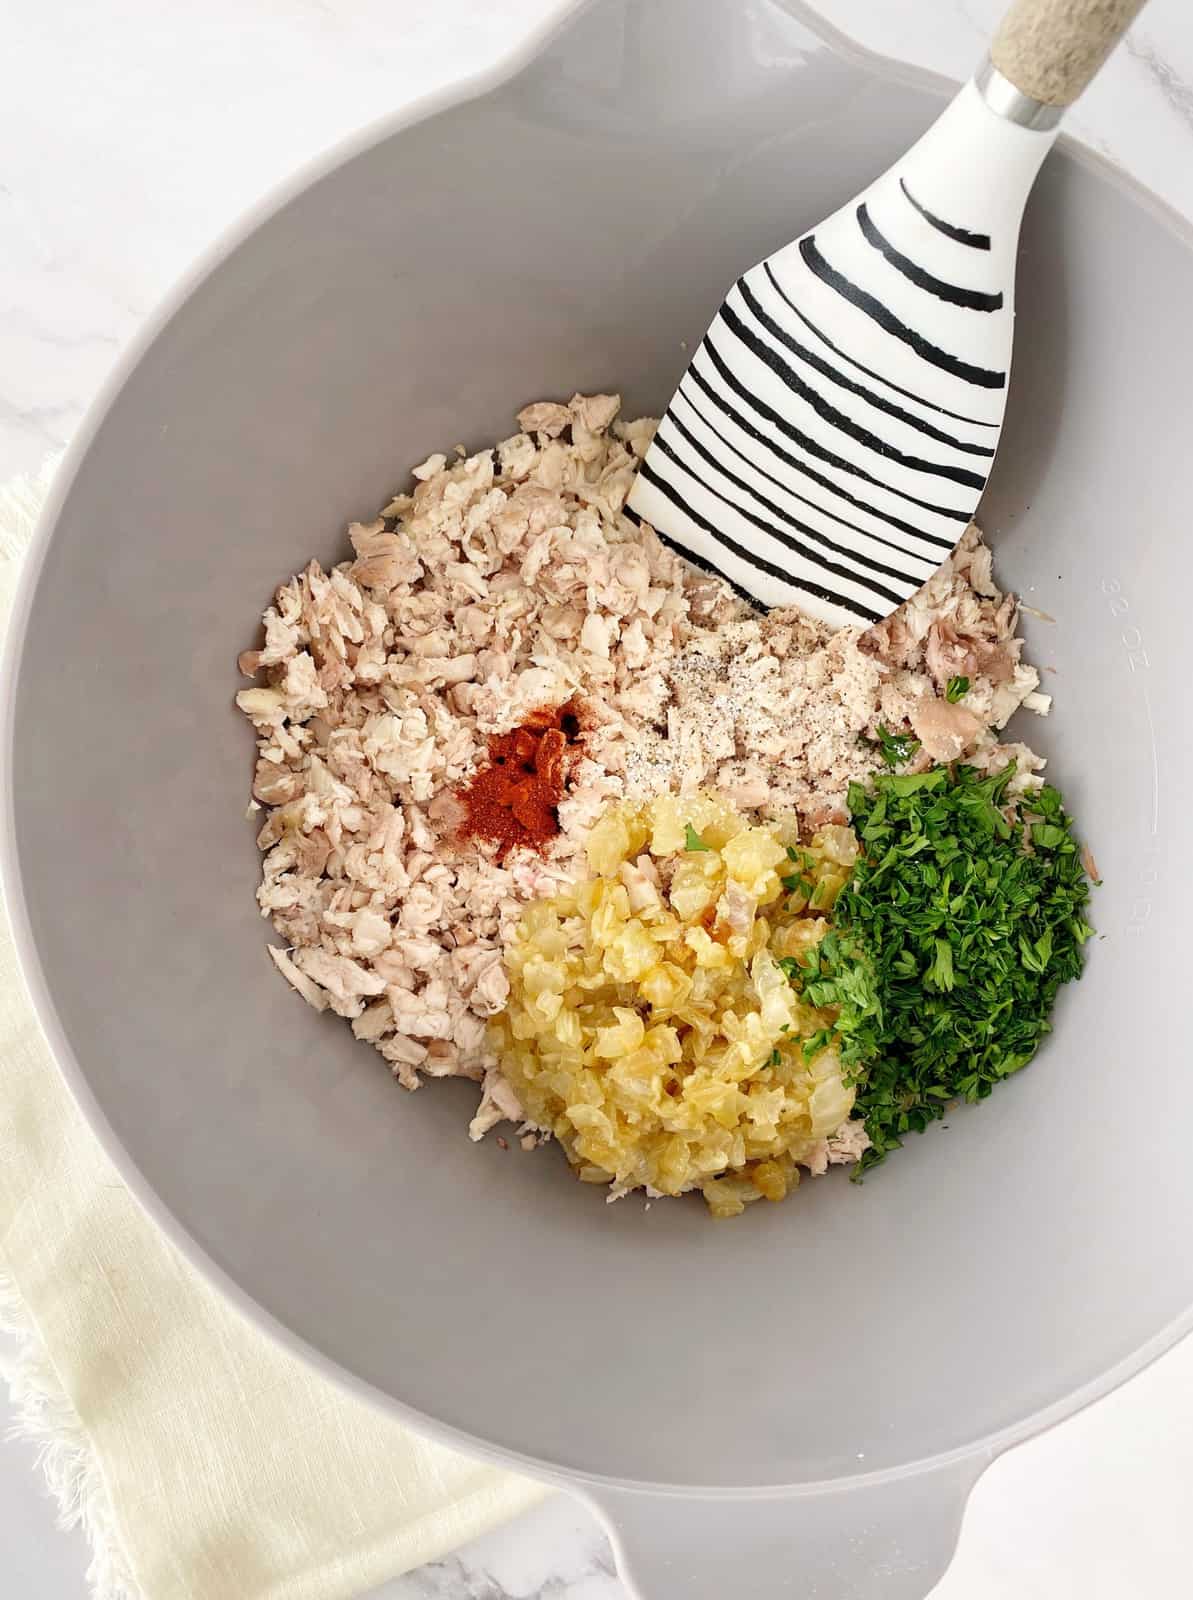
- Combine the finely shredded chicken, cooled onion-garlic mixture, parsley, paprika, salt and pepper. Mix until all ingredients are well incorporated. Set mixture aside.
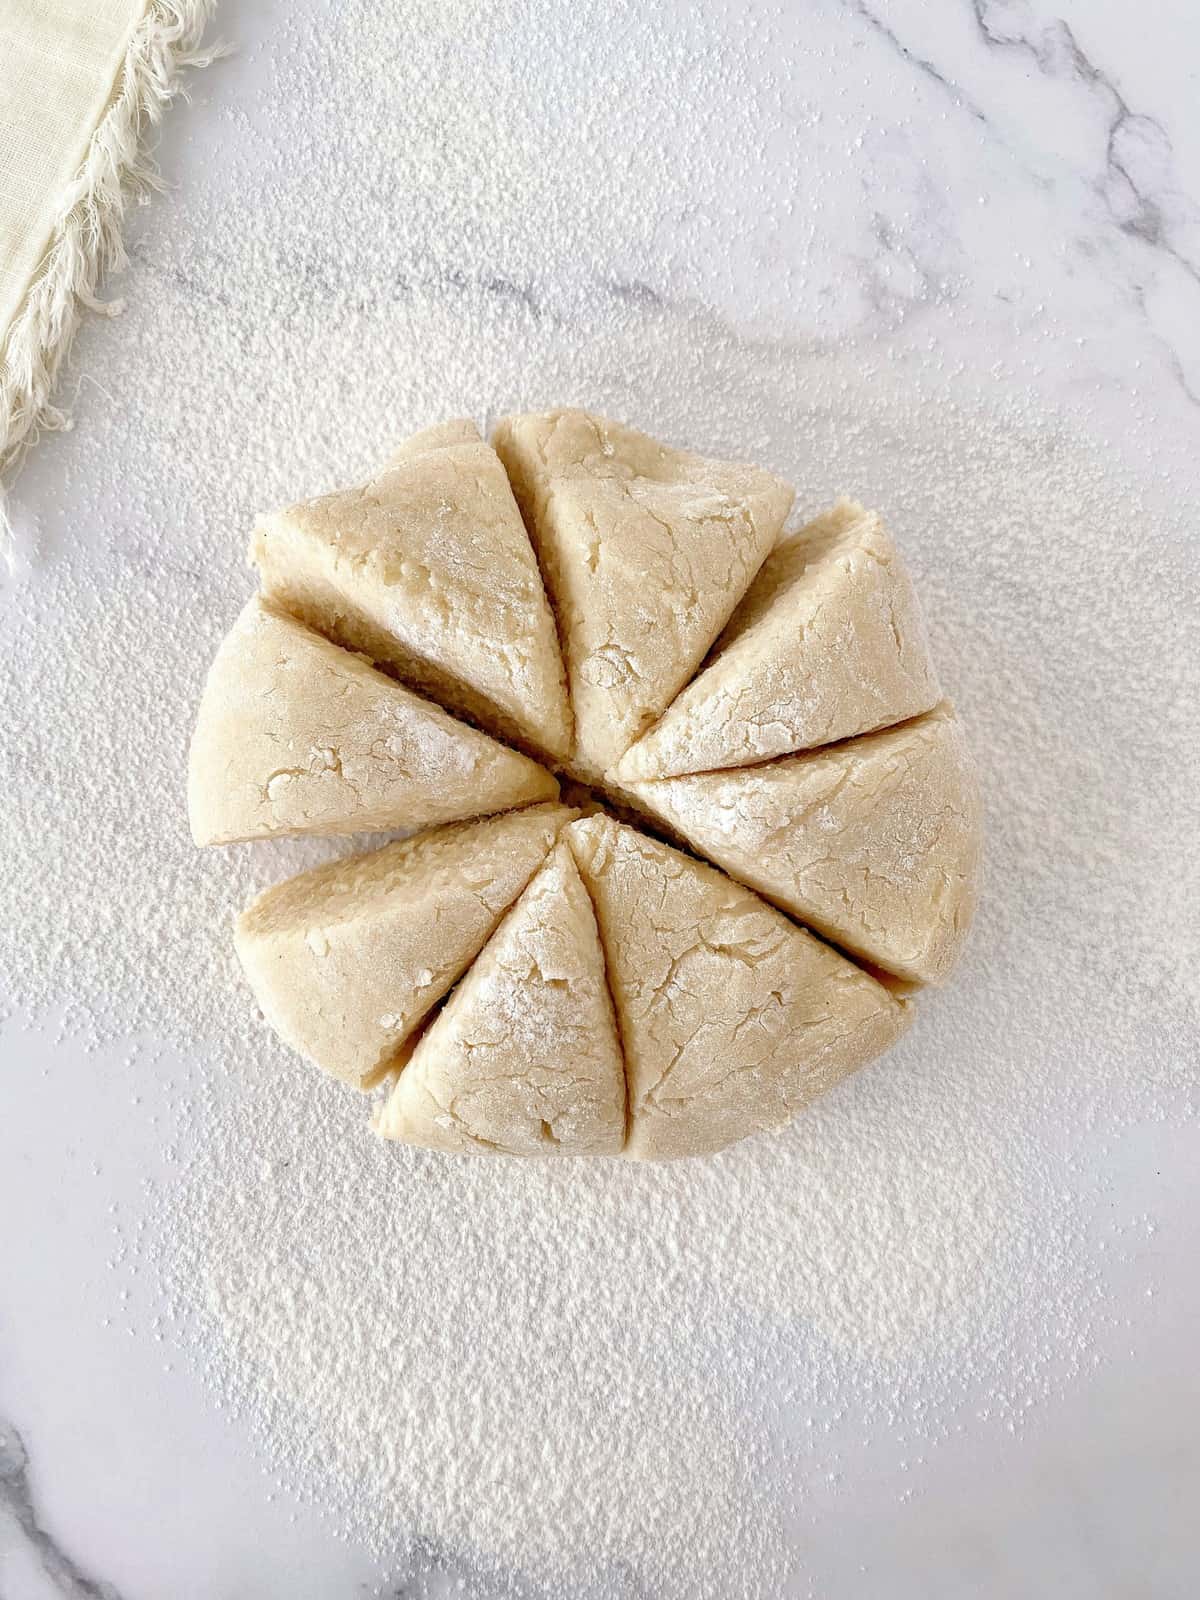
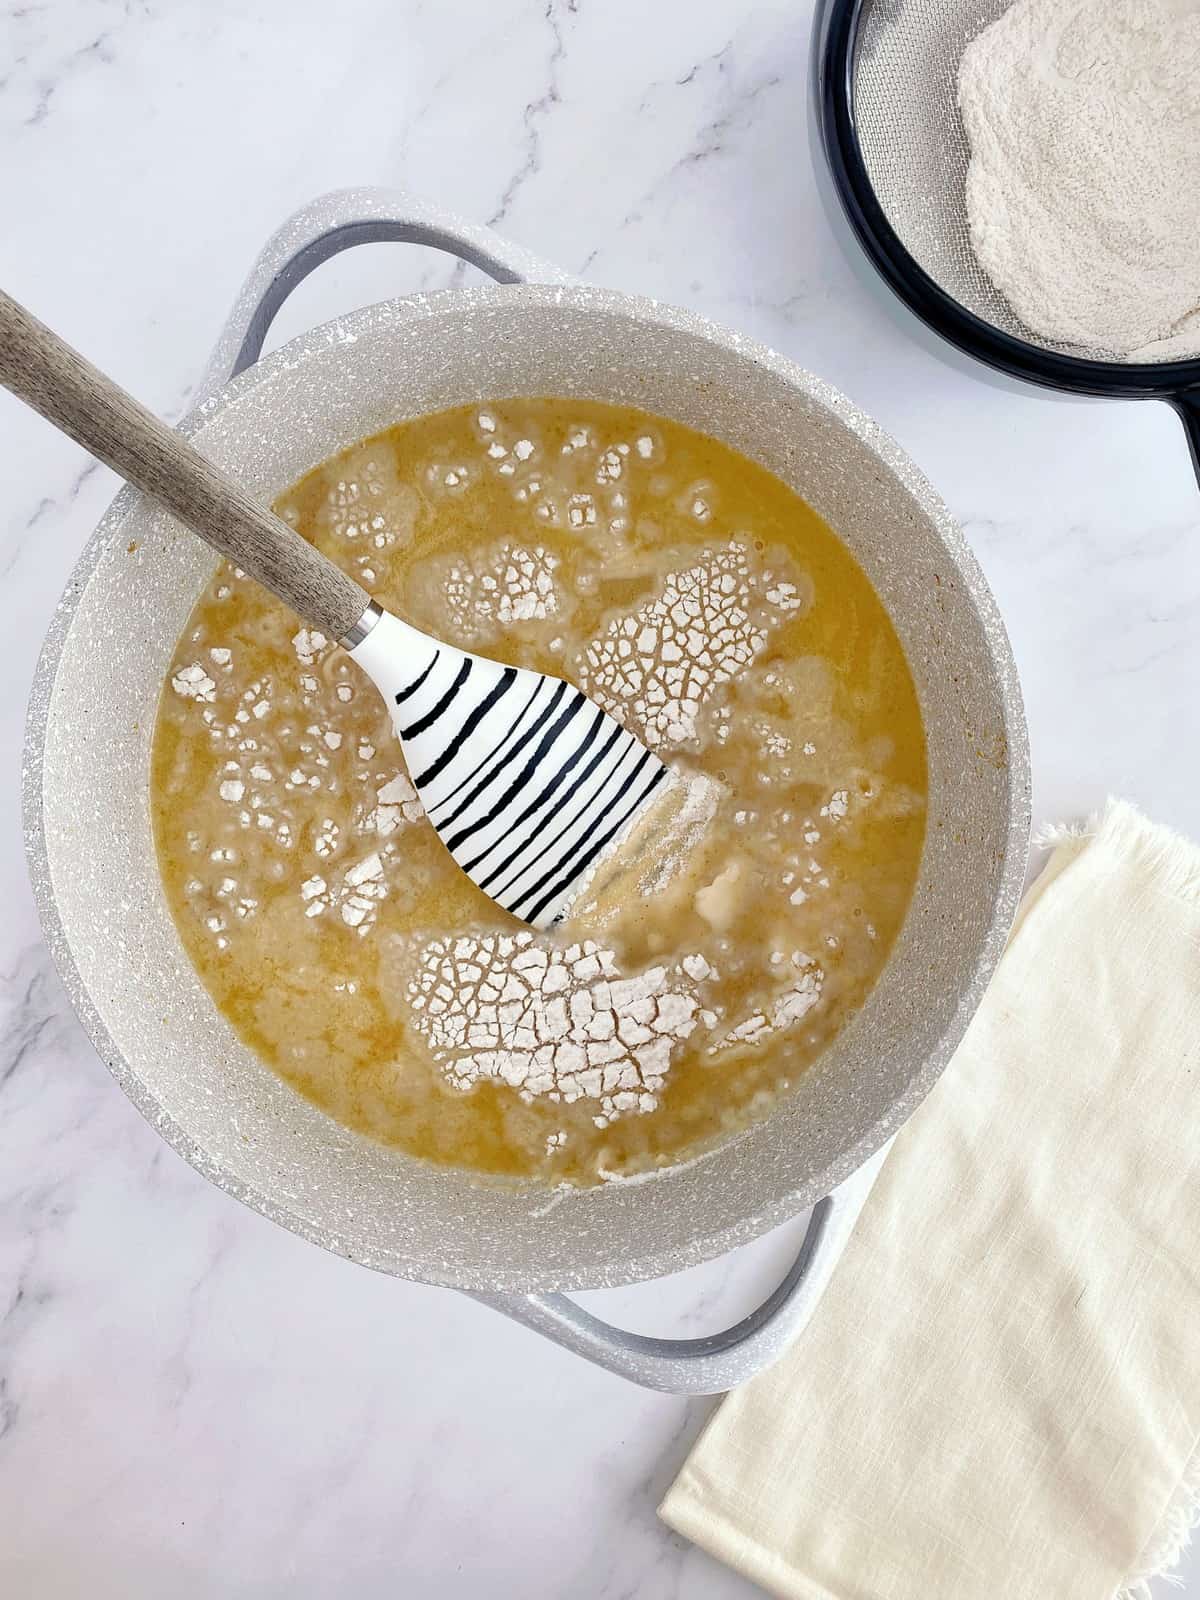
- Boil chicken stock, butter, paprika and salt to a boil in a pot. Lower heat to medium and add the sifted flour into the pot, very slowly, stirring until a dough is created. Cook for 1-3 minutes or until dough begins peel away from the pot. Dough should be soft but not sticky to the touch. Once the dough is cooled remove from pot onto a lightly floured surface and let cool. 8. Knead for 2-3 minutes until dough is smooth. Portion the dough into golf ball size amounts and flatten them a bit in the middle, creating a well for the filling.
- Add about 1 tbs of filling to each dough portion and pinch the tops closed by creating an elongated teardrop shape.
- Set up a breading station of breadcrumbs in one bowl and whisked egg and milk in another. Dip the coxinha first in the wet mixture then roll them evenly in the breadcrumbs until thoroughly coated. Repeat until all coxinhas are breaded.
- Bring frying oil to approximately 350F. This takes about five minutes over medium high heat. There should be enough oil to fully submerge the coxinhas. Fry them for 3-4 minutes, turning occasionally, until evenly golden brown.
- Transfer to paper towel to remove excess oil and enjoy warm.
Step by Step Instructions
To begin, cook your chicken. You want to ensure that the chicken is already cleaned and ready to go, then place it inside the pressure cooker, along with 1 ½ cups of water, ½ teaspoon salt and ¼ teaspoon pepper.
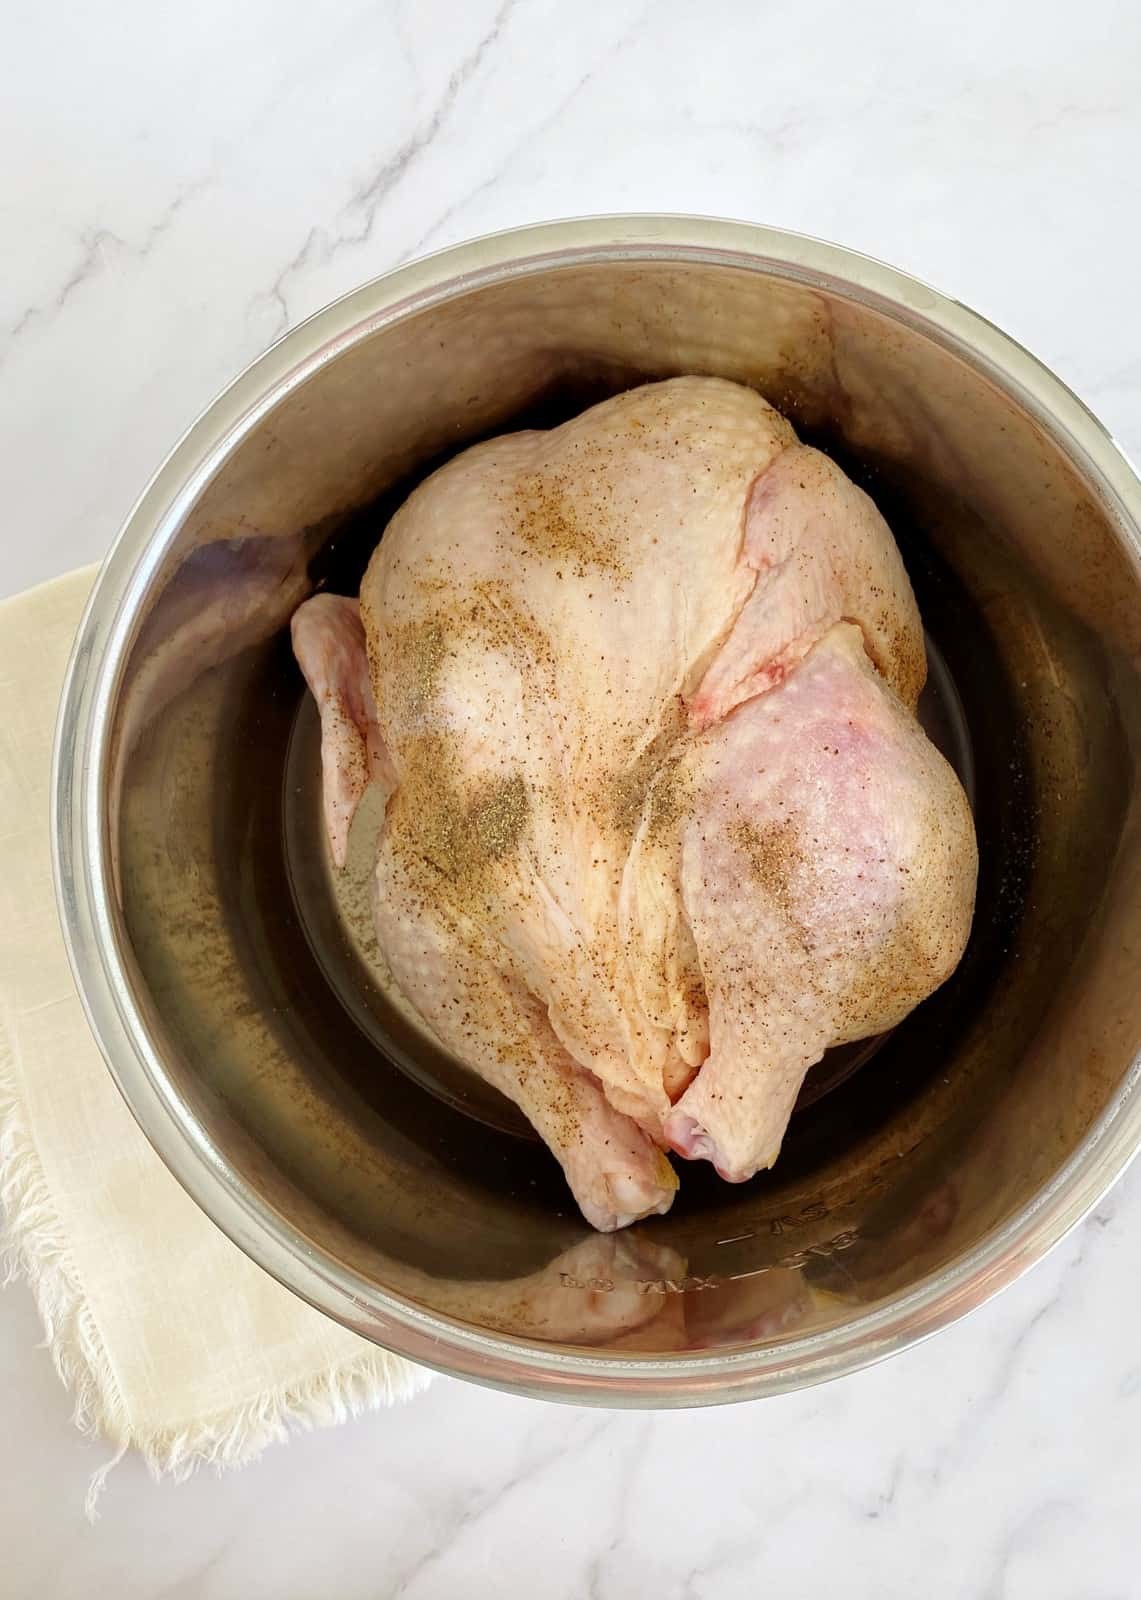
Cover and set to sealing position. Cook on high pressure for 21 minutes, or about 6 minutes per pound of chicken. Finish with 15-minute natural pressure release, and then manually release remaining pressure.
Once your chicken is done cooking, allow it to cool enough to handle. Then, shred it finely. Set aside 2 cups of chicken broth for later. Now it is time to prepare your filling! Start by your 1 tablespoon of olive oil over medium-high heat. Add your onion and garlic and sauté for 2-3 minutes, until the onions become translucent. Remove from heat immediately and set aside to cool.
Next, add your filling ingredients to a large mixing bowl. Mix shredded chicken, cooled onion and garlic, parsley, paprika, salt and pepper, until all ingredients are integrated. Set aside.
Next you need to prepare your dough. First, add your chicken stock, butter, paprika, and salt to a pot and bring to a boil.
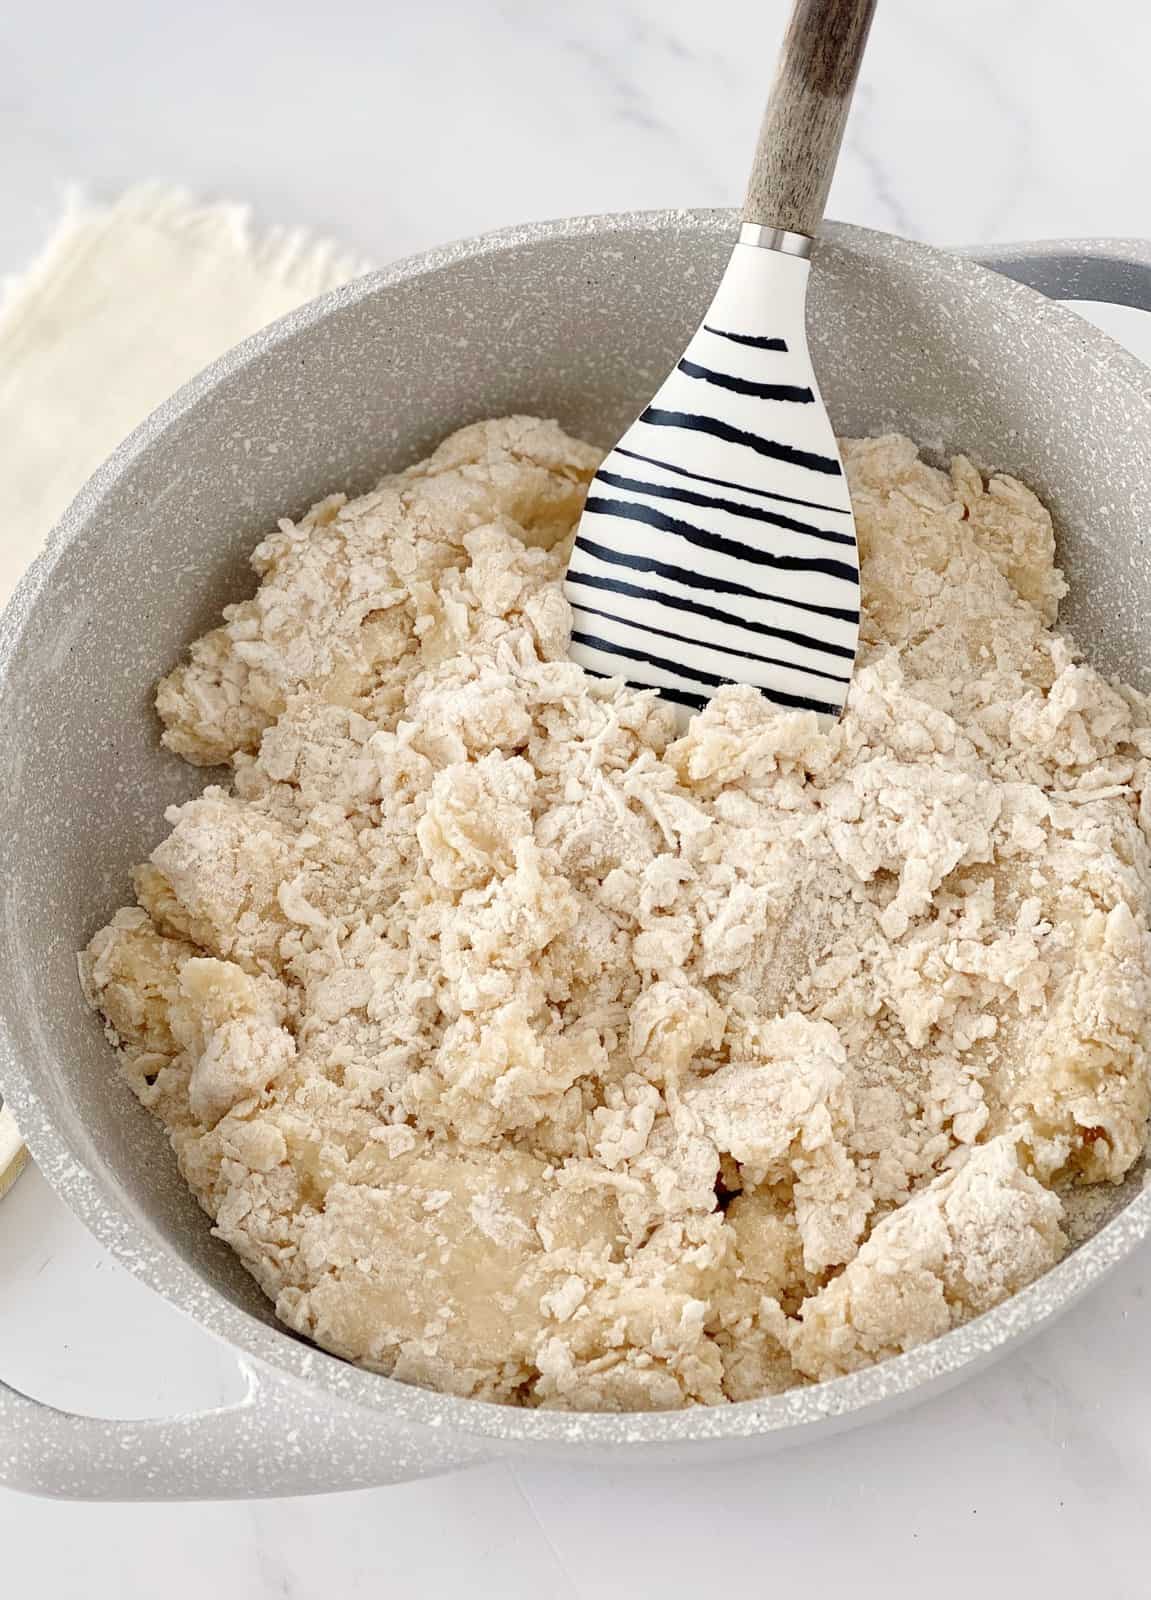
Lower your stovetop to medium heat, and begin slowly adding the flour to the liquid while stirring. It is important that you do this very gradually to avoid clumping. Stir the mixture until a dough forms, and cook for 1-3 minutes, or until the dough begins to peel away from the pot, and is no longer sticky. If the dough still feels sticky to the touch, cook for an additional minute. Once your dough is cool enough to touch, remove it from the pot and place it on a flat, lightly floured surface to finish cooling. Once it has cooled, knead for 2-3 minutes, or until smooth.
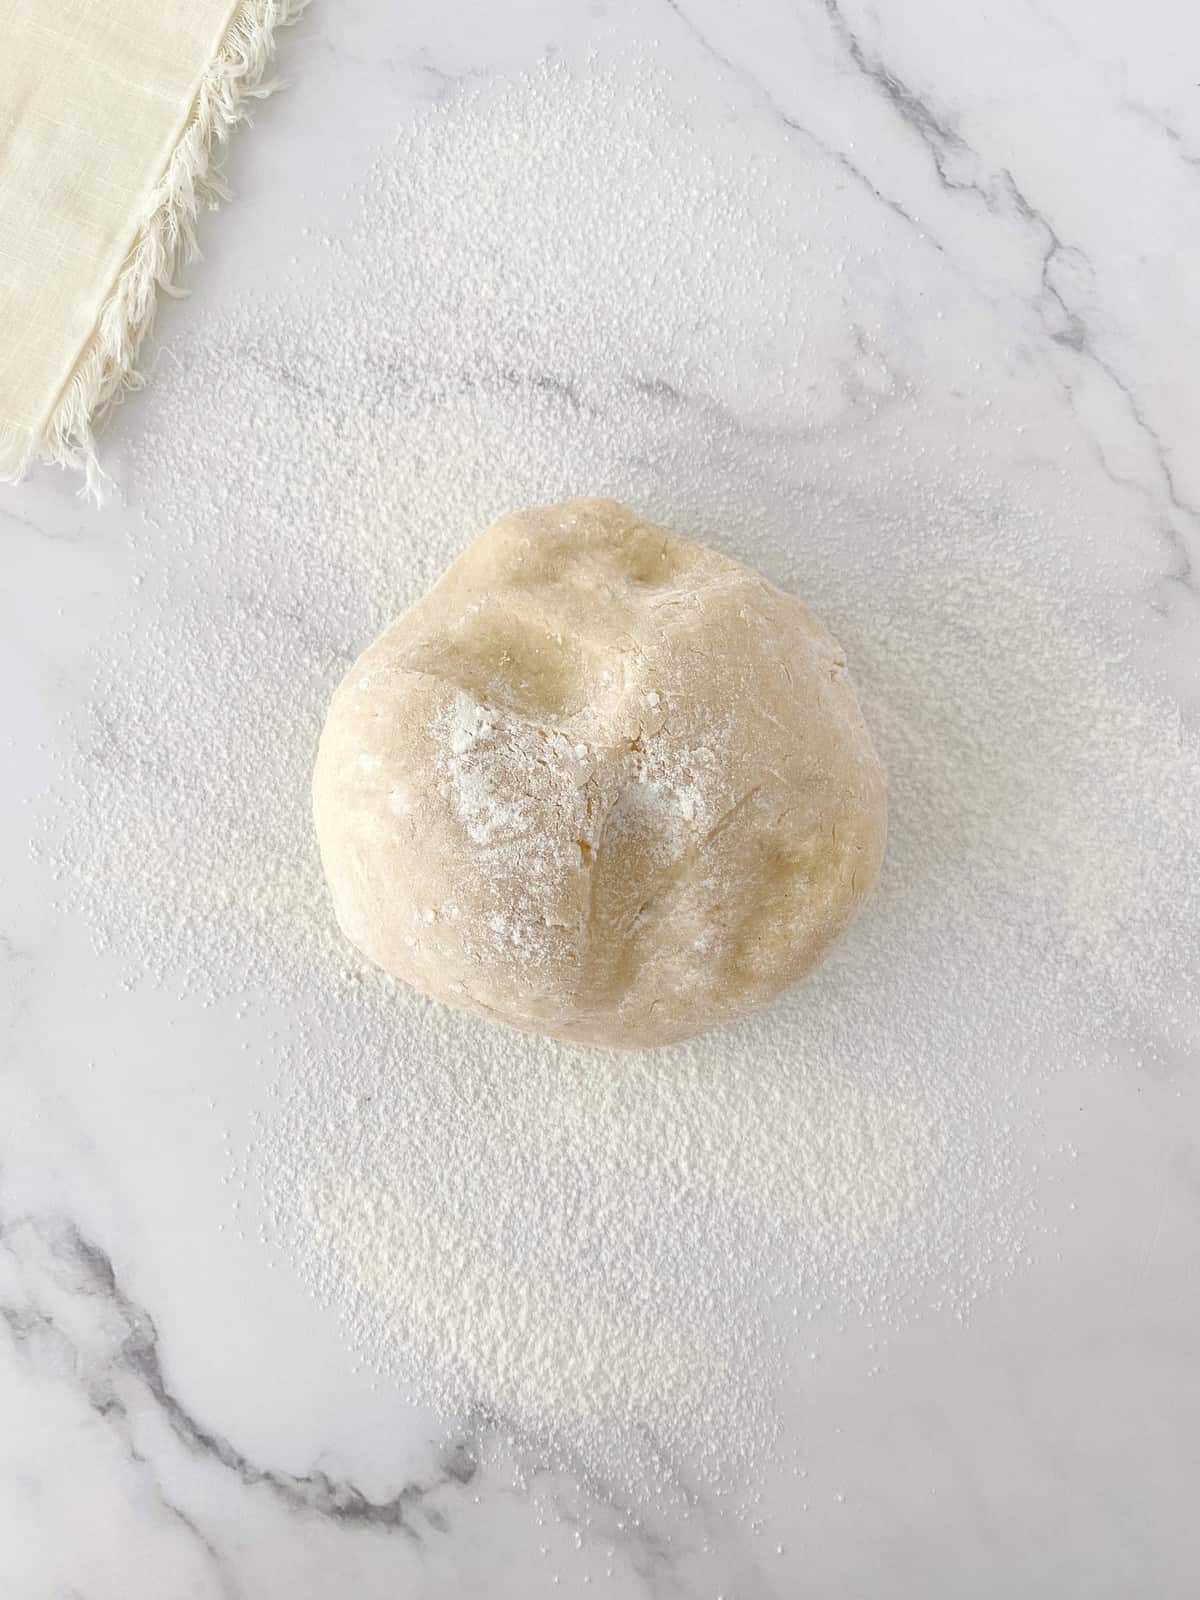
Divide your dough into balls around the size of a golf ball. Create a well in the center for your filling.
Next, add approximately 1 tablespoon of filling to each well. Then close the dough, pinching at the top to create a teardrop shape. Coxinhas are known for having this shape, so if you want to be authentic, make sure you follow this step.

Now it is time to bread the coxinhas. Place your breadcrumbs in one bowl, and whisk your egg and milk into a separate bowl. Dip your coxinha in the wet bowl, and then coat it in the breadcrumbs. Repeat this step until all of your coxinhas are breaded and ready to fry!
I love my coxinha deep fried. Heat your cooking oil over medium-high heat for about 5 minutes, which should bring it to about 350 degrees.

Place your coxinhas in the oil. Make sure you completely submerge the croquettes. Fry for 3-4 minutes, turning occasionally, until your coxinhas are golden brown.
Place cooked coxinhas onto a paper towel-lined plate to allow them to cool slightly, and drain off any excess oil. Enjoy warm!

Cook's Tips
- Enjoying Coxinhas fresh is best, but if you wish to keep leftovers, they will last 2 days in the refrigerator. They tend to soften when refrigerated, so it is best to reheat them by frying again, or by air frying.
- You can keep coxinhas in the freezer for up to 3 months. Reheat them in the microwave in 30-second intervals, or in the air fryer at 375 for 5 minutes.
- The cook time for your chicken depends upon the weight of the chicken. Quick Reference in recipe card below. Here is a quick reference:
FAQ
Coxinha is a fried wheat dough chicken croquette.
You may find it easiest to hold the coxhina by the pointy tip, and eat it from the bottom. You can also enjoy Coxinhas with dipping sauces like hot sauce, or a zesty mayonnaise dip.
Coxinha (ko-sheen-yah) is Portuguese for drumstick, named for its shape!
You can deep fry it in oil over medium-high heat for 5 minutes, until golden brown. You can also cook it in the air fryer at 375 for 5 minutes. If you have already deep fried before, simply microwave them in 30 second interavals.
Looking for more Instant Pot? Try these:
Tried this Coxinha recipe and love it? Please leave me a comment and rating below. Feel free to also tag me, I love to see your creations and sharing them. For more inspiration follow us on Instagram Or like us on Facebook

Coxinha Chicken Croquettes
Ingredients
For the Dough
- 2 cups AP Flour sifted
- 2 cups Chicken Stock reserved from pressure cooker
- 2 tbs Butter
- ¼ teaspoon Paprika
- ½ teaspoon Salt
For The Filling
- Small Whole Chicken about 3-3 ½ lb
- ½ teaspoon Salt
- ¼ teaspoon Pepper
- 1 ½ cups Water
- 1 Small Yellow Onion finely chopped
- 2 Cloves Garlic minced
- ¼ cup Fresh Parsley chopped
- ½ teaspoon Paprika
- 1 tbs Olive Oil
- ½ teaspoon Salt
- ¼ teaspoon Pepper
Notes
- Cooking Times Based on Chicken Weight
3 lbs = 18 minutes on high pressure with 15-min natural release
3 ½ lbs = 21 minutes on high pressure with 15-min natural release
4 lb = 24 minutes on high pressure with 15-min natural release
4 ½ lb = 27 minutes on high pressure with 15-min natural release
5 lb = 30 minutes on high pressure with 15-min natural release
Nutrition


Leave a Reply