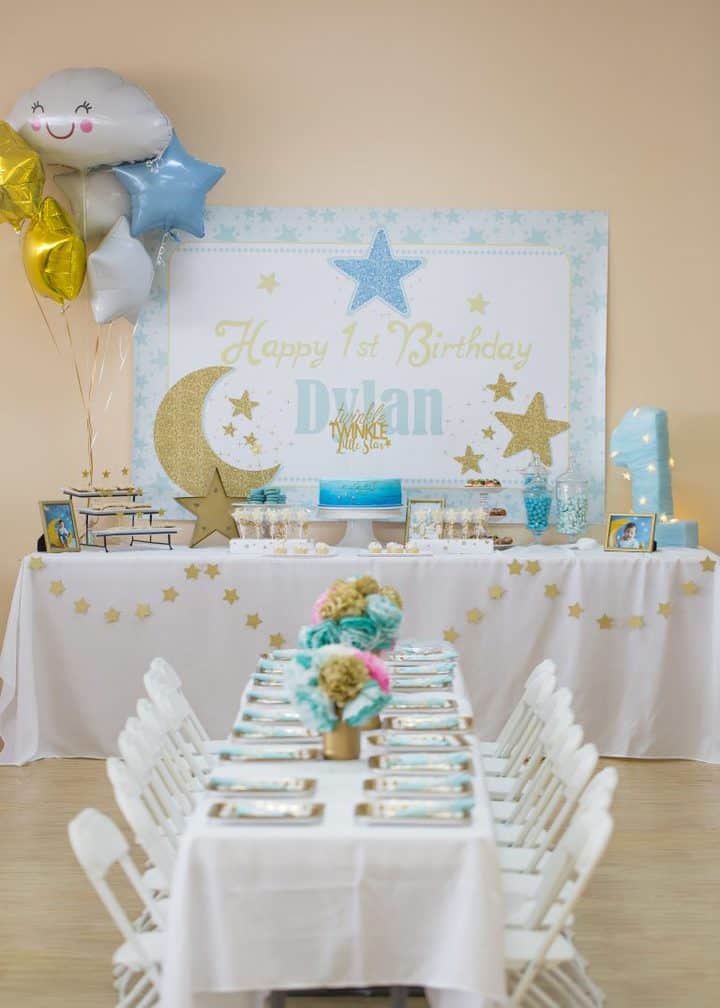
I absolutely love parties. A fun fact about me is I've always wanted to be an event planner since I was a teenager. I never pursued it, so when it's time for my kid's first birthdays I have a lot of fun. First birthdays are big in our family and I'm always excited to use my imagination and make it into reality.
My youngest son lights up when I sing Twinkle Twinkle Little Star. That's one of the reasons I chose this theme. I added some golds and a hint of pink to create a softer look. I made almost everything myself, so if I can do it, you can too! It just takes a bit of time, but crafting is my favorite stress reliever. I hope my baby's party (yes, he's still my baby), gives you some inspiration!
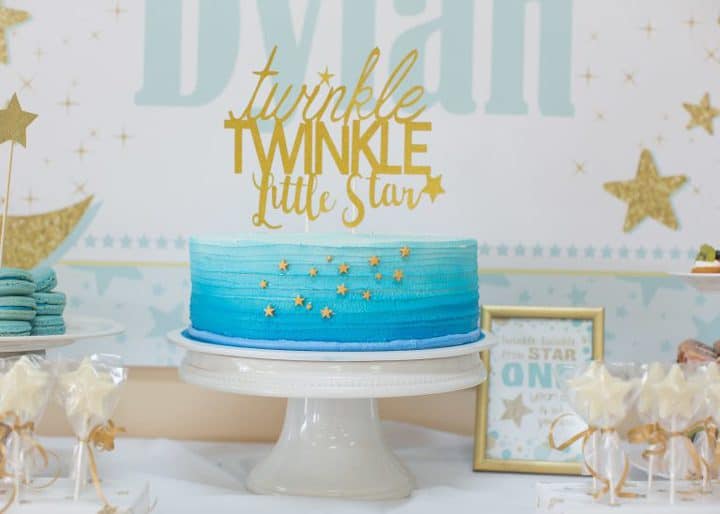
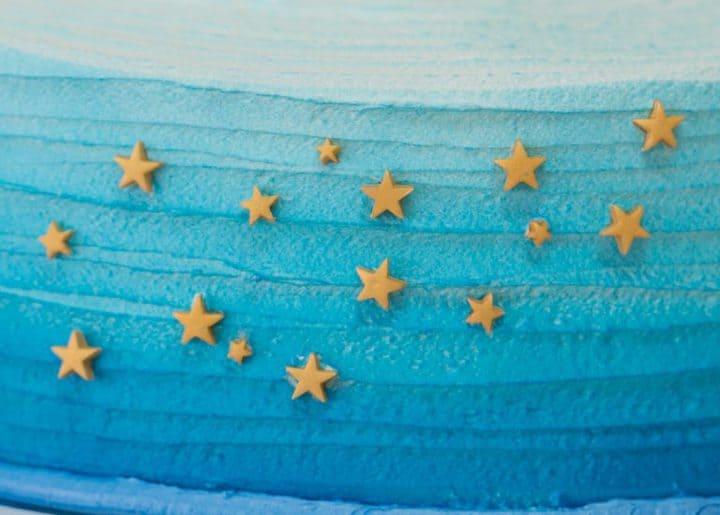
Cake
I love simple cakes. Not just because they create a cleaner look, but because its cheaper! I have yet to venture off into making cakes. Since I'm frugal especially when it comes parties, I chose to buy a buttercream cake instead of fondant. Maybe someday I'll venture off into cake making, but not anytime soon! I made the cake topper with my silhouette and a good friend designed the fondant stars. Voila! This was a lot cheaper than the fondant cakes I was looking at. In my humble opinion, it's just as pretty!
Centerpieces
I have to admit these flowers were time-consuming to make, but they were not difficult. I was able to find some ombre pink tissue paper, and ombre blue tissue paper to add some dimension to my flowers. I found the blue at my local craft store. If you can't find ombre, you can definitely inter change lighter blues with darker blues. If I were you though, you may want to opt for the ready-made ombre color to save you time. After making your 20th rose, you maybe asking yourself why did I start this. But look.. it's so worth it! It's also so much cheaper than real flowers too! Just message me if you'd like for me to do a video on how to make it. But there are plenty on youtube.
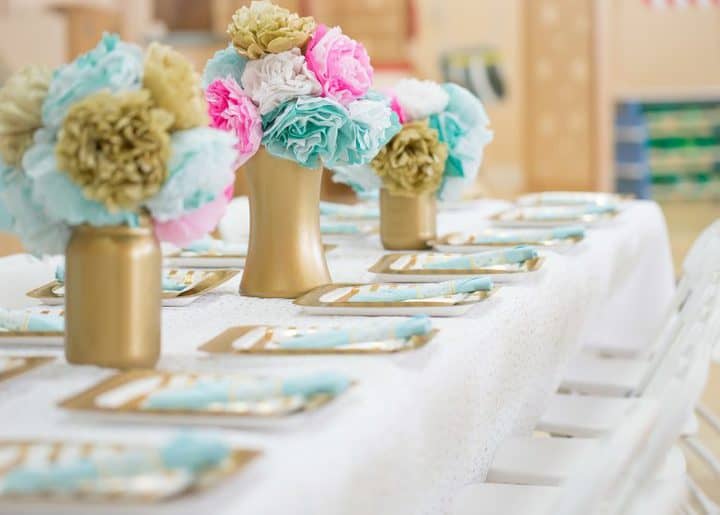
I changed up some of the centerpieces to included painted mason jars and glittered painted jars. I added these twinkle lights to create the right ambiance. They're perfect because its battery operated and turns on with a flick of a switch.

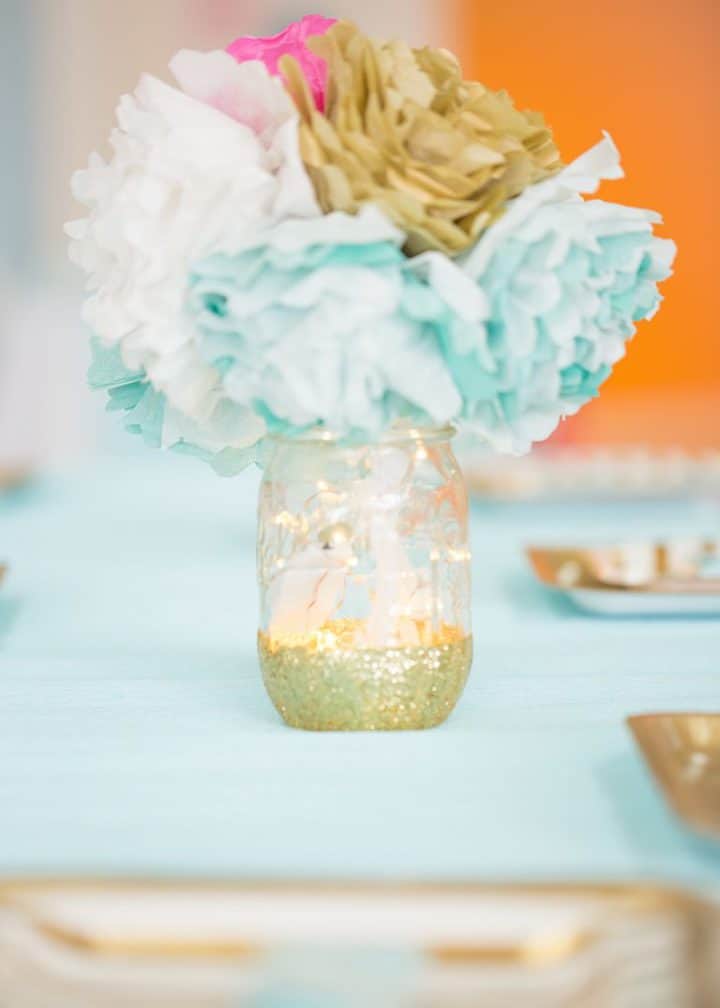
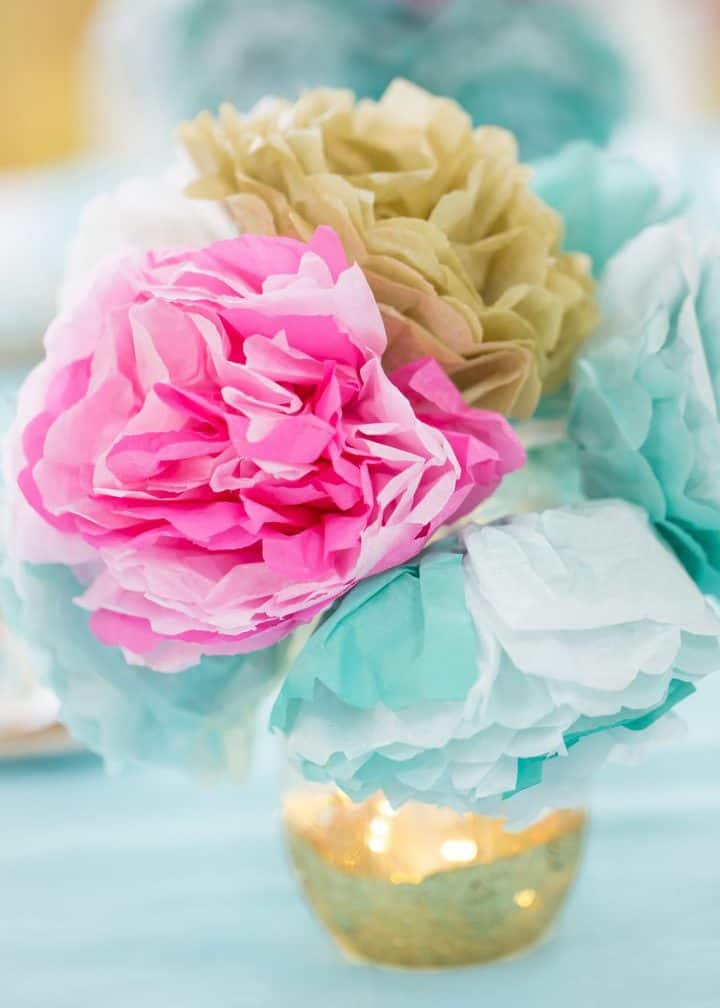
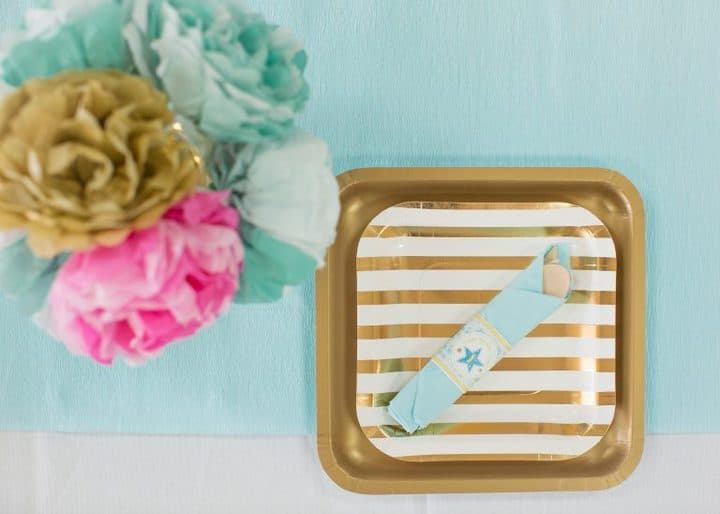
Table Setting
For the table setting, I found some square plates online. I also added a rustic touch to the table by using wooden utensils instead of plastic. I couldn't find the exact plates, but the ones I listed above are the same or similar.
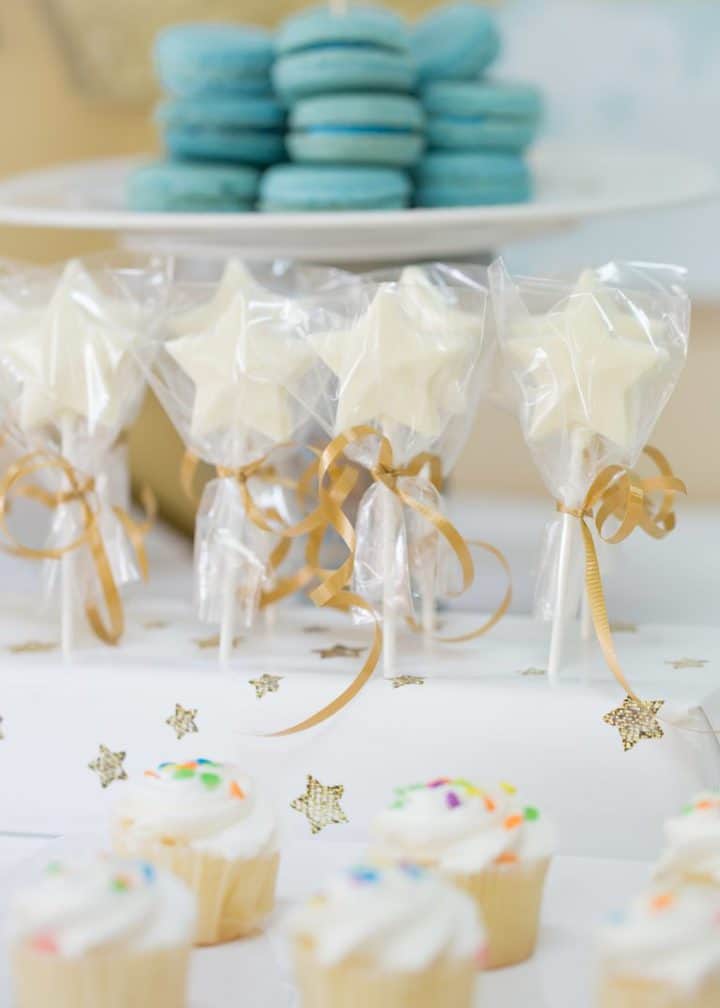
Chocolate Star Favors
If you follow me on Instagram, you may have seen me make these. It's so super easy! All you need is a mold, some lollipop sticks, and some chocolate. You can also use candy melts if you can't find the merkens. The candy melts or chocolate melt great in the microwave. I then used a spoon to pour the chocolate into the mold. Freeze for 15-20 minutes and you're all done!
#1 Sign
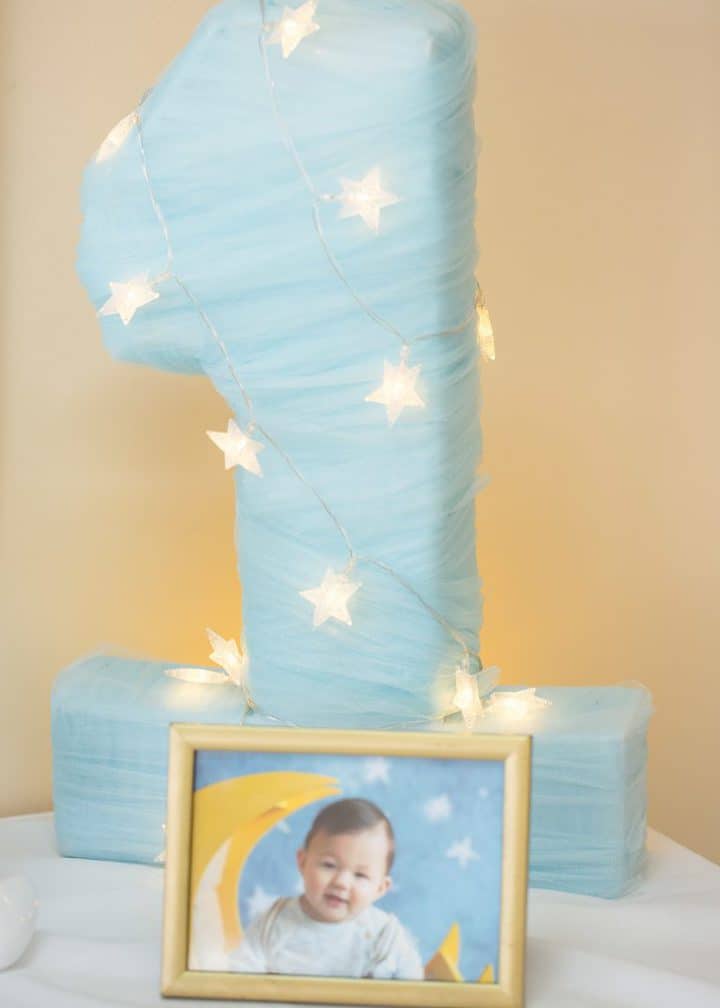
This #1 is made out of card board box. I made a number one shape and then glued and taped it three dimensionally. I then added weight to the bottom of the number one by using rice in ziplock bags. After sealing it, I then wrapped the shape in tulle. To tie it in to the theme, I wrapped the number one with the star lights!
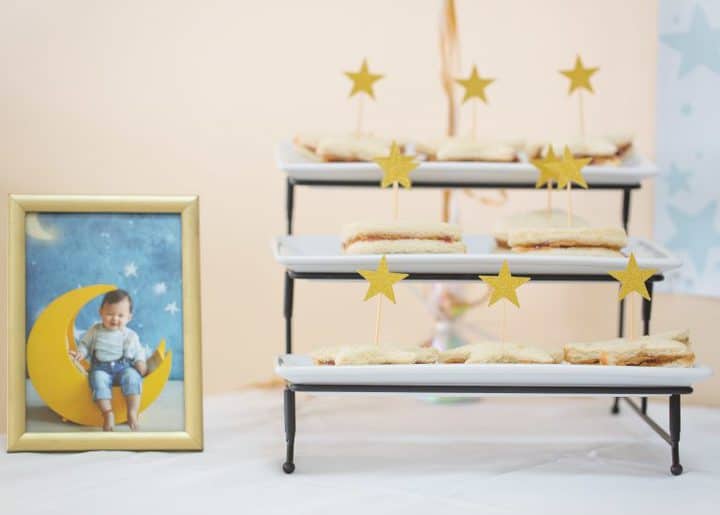
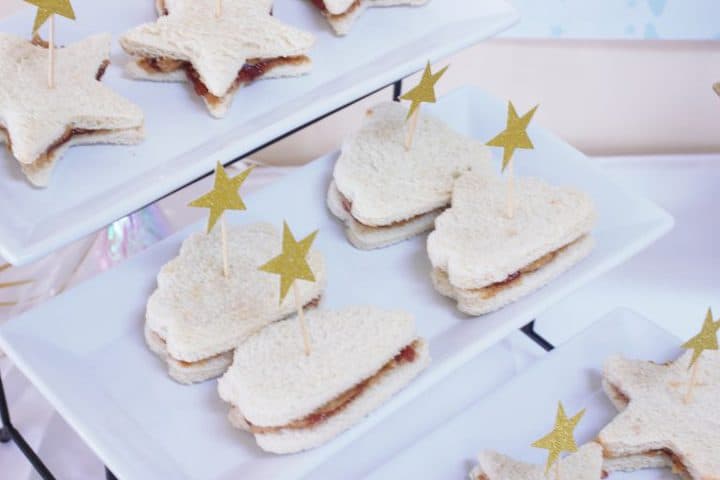
Food
We did cater from an outside restaurant, but I wanted to make sure everyone had something to choose from including picky toddlers! I made these super easy star and cloud shaped peanut butter and jelly sandwiches.
All I did was use these cookie cutters. Star and Cloud. The best part about it you can always reuse them to make lunches for your kids!

In case you are wondering the wonderful photography is from my friend Dawnley.
**If you decide to make a purchase through the affiliate link, Amazon will pay me a very small commission for it. This does not cost you anything additional. These commissions help to keep the rest of my content free. Thank you!